Coastal Wall Decor: How to Make an Easy Driftwood Starburst
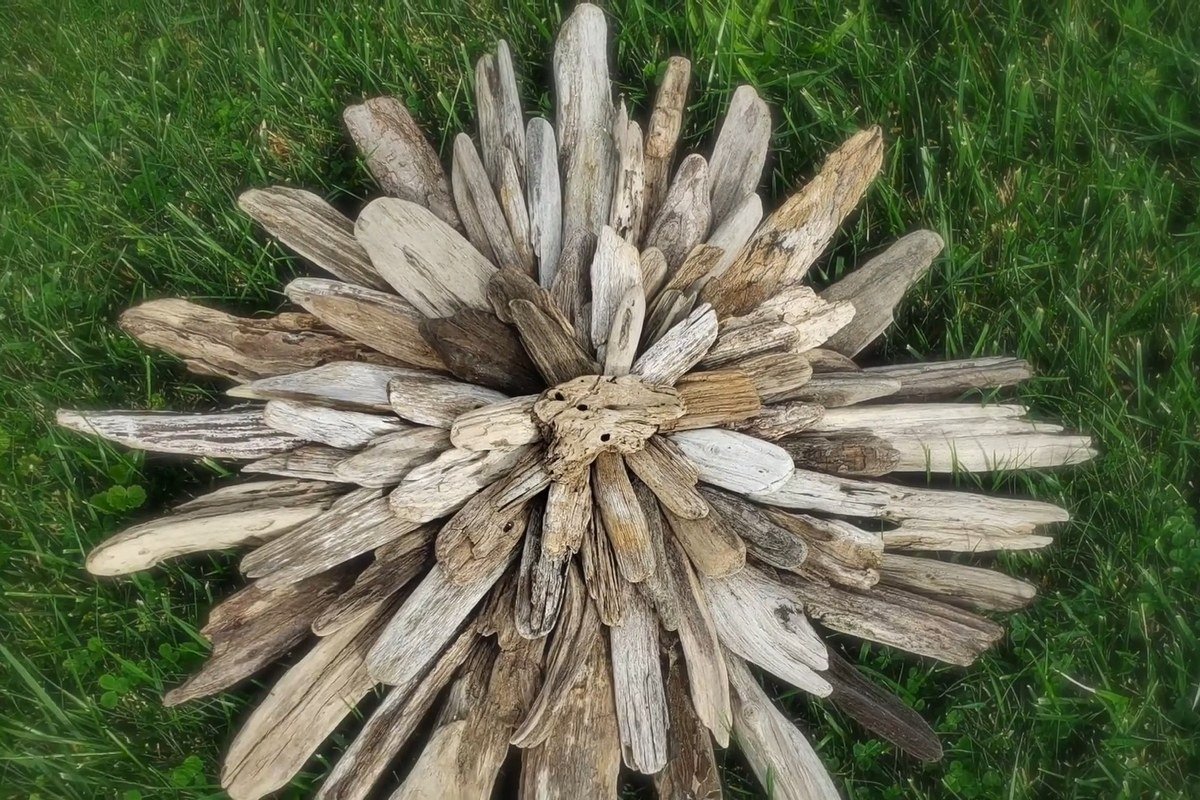
Coastal wall decor does not have to come from a store: a driftwood starburst about 20 inches across can be built from beach or river wood, a cardboard circle and a hot glue gun. Expect to spend roughly $15 to $36 if you already own a glue gun and forage the wood, about an afternoon of sorting, fitting and gluing, and only beginner skills. The one thing you cannot rush is collecting enough flat, dry pieces.
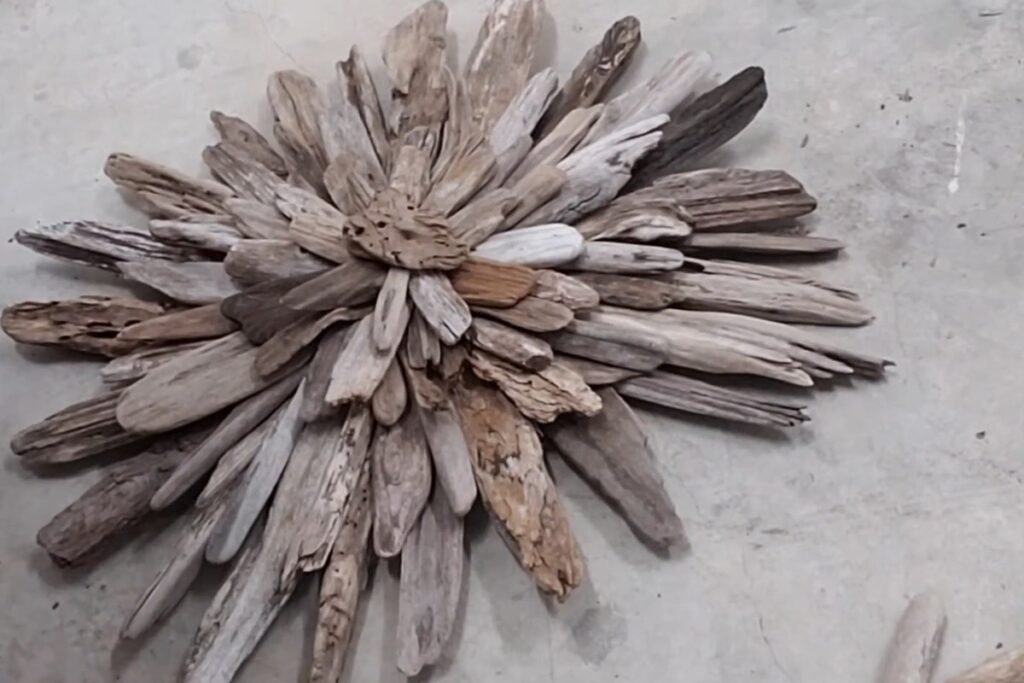
The method below builds this coastal wall decor in three or four layers. Long arms go down first, each new layer sits a little further in than the one below it, and a single chunky piece hides the middle. Every step has a photo so you can check your layout against it before the glue goes on.
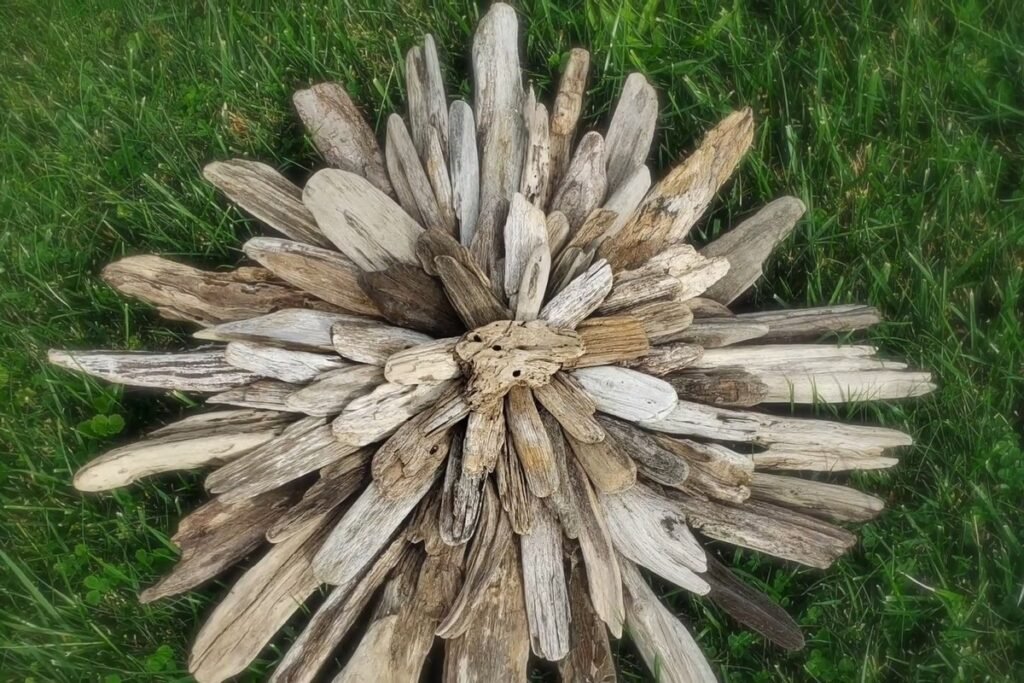
Table of Contents
Driftwood Starburst at a Glance
| What | Answer |
|---|---|
| Finished size | About 20 in across (a 10 in base plus a 5 in overhang on each side) |
| Driftwood needed | About 100 pieces of mixed lengths, flat on at least one side |
| Cost | About $15 to $36 with your own glue gun and foraged wood; about $33 to $63 if you also buy a glue gun |
| Active time | An afternoon; most of it is sorting and dry-fitting, not gluing |
| Drying time | None to plan around for the glue; the wood itself must be fully dry before you start |
| Difficulty | Beginner |
| Renter-safe | Yes, hung from one picture hook or rated adhesive strips (see the safety notes) |
Materials and Tools for Coastal Wall Decor
Nothing on this list is specialist, which is a big part of why homemade coastal wall decor costs so little. Prices are typical US ranges at large retailers in 2026 and will vary by store and pack size.
| Item | Amount | Price range | Budget swap |
|---|---|---|---|
| Driftwood pieces | About 100, from about 12 in down to 2 in | Free if foraged; store-bought bags vary too much to quote | Free from a shore where collecting is allowed |
| Thick cardboard | One piece at least 10 x 10 in | Free | A flattened home-delivery box |
| Hot glue gun | 1 | $17.59 to $27.69 | Borrow one; a mini gun works but needs more refills |
| Hot glue sticks | About 1 pack | $8.19 to $15.99 | Buy a bulk pack if you plan more than one piece |
| Wood screws | 1 to 4, about 1 in long | $3.99 to $8.69 (small mixed kits) | Skip them and use adhesive strips |
| D-ring or sawtooth hanger | 1 | $2.79 to $10.99 | A loop of strong wire glued and screwed on |
| Measuring tape, marker, craft knife or strong scissors | 1 each | Usually already at home | A ruler and a pencil |
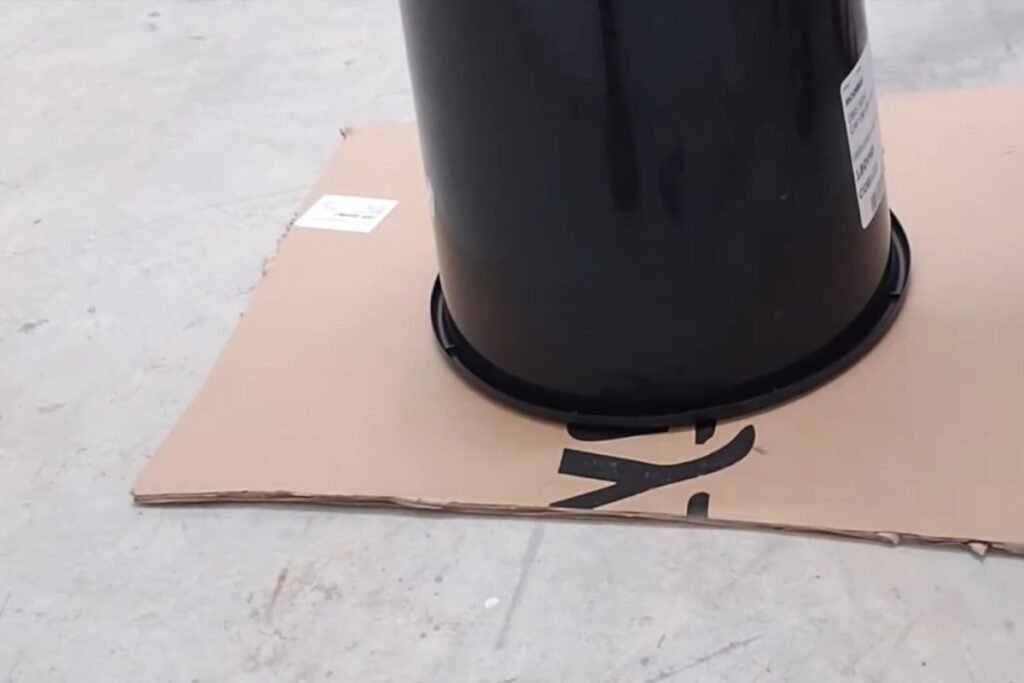
| Something round about 10 in wide to trace | 1 | Free | A bucket, plant pot or dinner plate |
Before You Start: Finding and Preparing the Driftwood
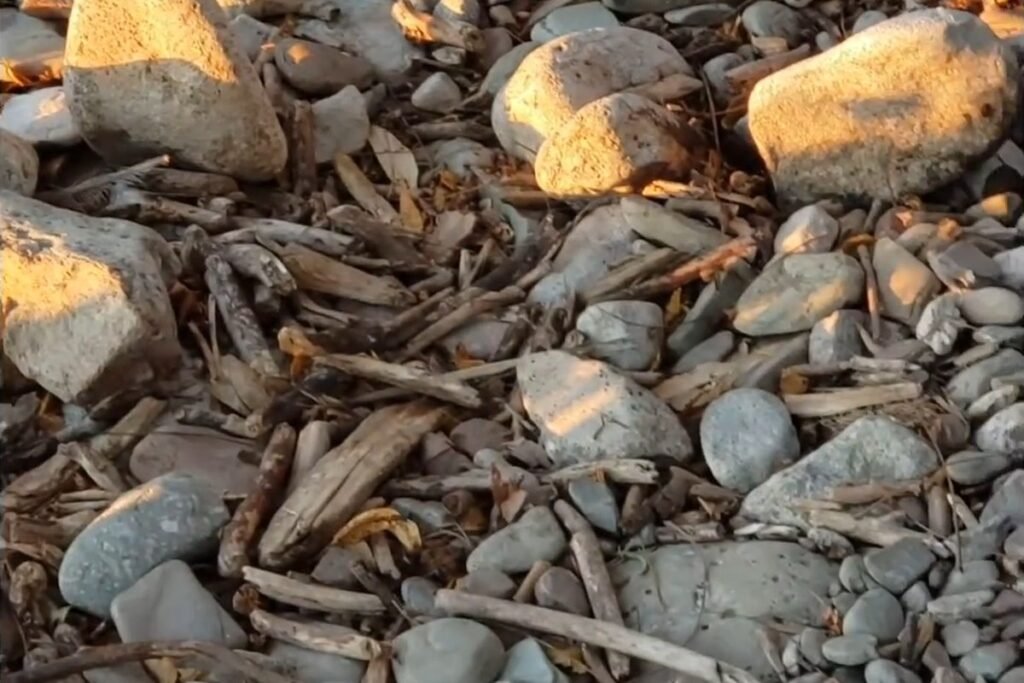
Collect only where it is allowed, because the rules change from beach to beach. Gulf Islands National Seashore, for example, lets visitors take only seashells and treats wood as part of the habitat.
California state parks limit visitors to 50 pounds or one piece of driftwood per day, for personal use only and without tools, and Oregon rules for its ocean shore never allow wood embedded in the beach or dune banks to be taken. Researchers also note that driftwood provides habitat and helps stabilise beach sediment, so take loose, small pieces and leave big logs where they lie. Check the local rules before you fill a bag.
Along the seashore, sun and rain wear wood down to the silvery grey that makes coastal wall decor look right, according to the USDA Forest Products Laboratory. That weathered surface often carries sand and grit, so rinse the pieces, scrub them with a stiff brush and let every one dry completely: damp wood is the most common reason a piece pops off later.
If you are worried about insects, University of Kentucky entomologists describe heating small wooden items in a home oven at its lowest setting (about 150 to 170°F) for 45 minutes to an hour with a pan of water on the rack below, then leaving them in the cooling oven for another hour. Stay with the oven the whole time and do it before any glue goes on.
Sort what you bring home into three rough piles before any glue comes out: long pieces for the arms, medium pieces for the second layer, and short, chunky ones for the middle. Keep one interesting knot or chunky offcut aside for the very centre. Pieces that rock when you lay them down are fine for the top layers, but the first layer needs wood that lies flat on the cardboard.
How to Make This Coastal Wall Decor, Step by Step
Step 1: Cut a 10 inch cardboard circle
Trace around a bucket or pot on thick cardboard and cut the circle out. Home-delivery boxes are usually sturdy enough. The circle is 10 inches in diameter because the arms will overhang it by 5 inches on each side, which brings the finished piece to about 20 inches, a good size for coastal wall decor above a console or sofa.
Step 2: Lay the four main arms
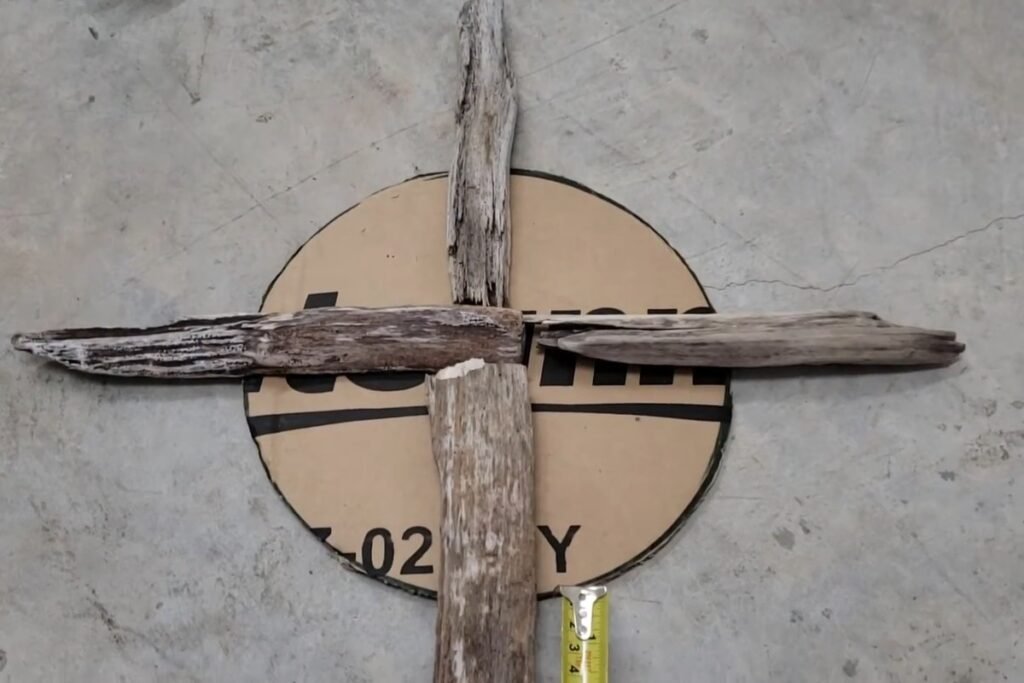
Pick four of your longest flat pieces and lay them in a cross through the centre of the circle. They do not have to reach the exact middle. What matters is that enough of each piece sits on the cardboard for the glue to grip.
Step 3: Measure the overhang on every arm
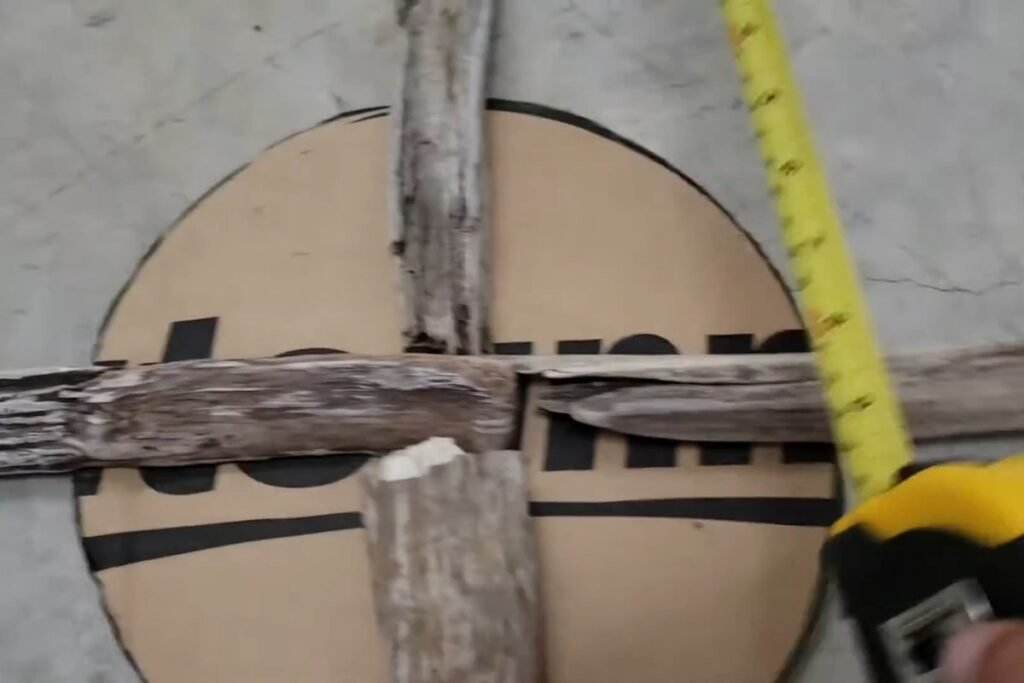
Slide each arm until about 5 inches sticks out past the cardboard edge. Check all four with a tape measure. These four lengths set the size of the whole starburst, so get them even now.
Step 4: Dry-fit the whole first layer
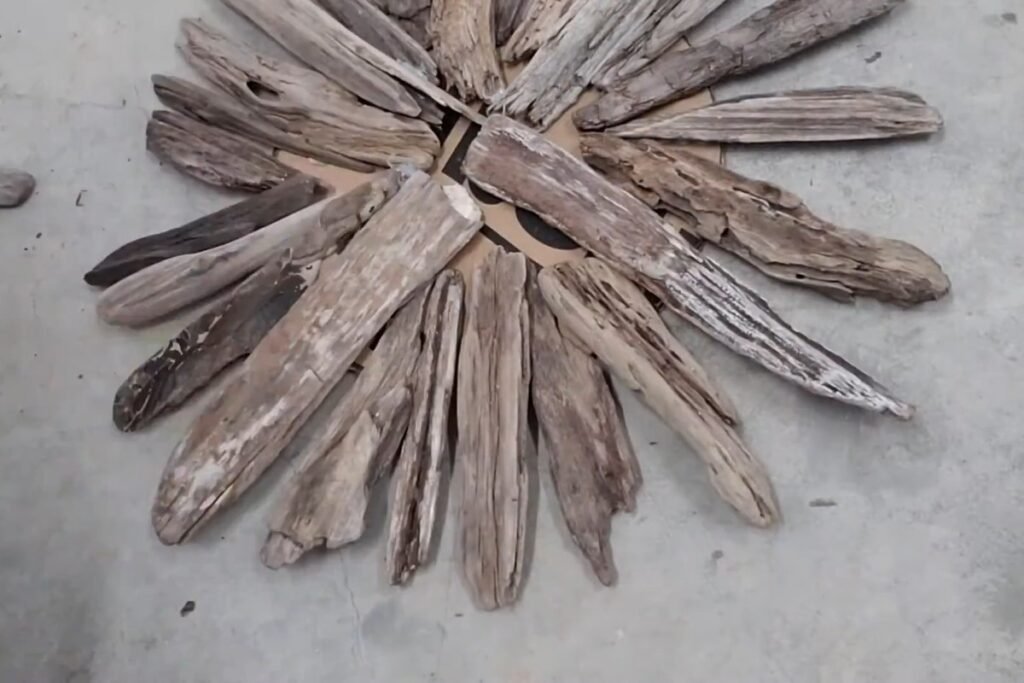
Before any glue, arrange the rest of the first layer around the cross like spokes. Leave the pieces in place once you like the layout, so you do not have to work it out twice. Treat it like a puzzle: if a piece will not sit right, swap it for another.
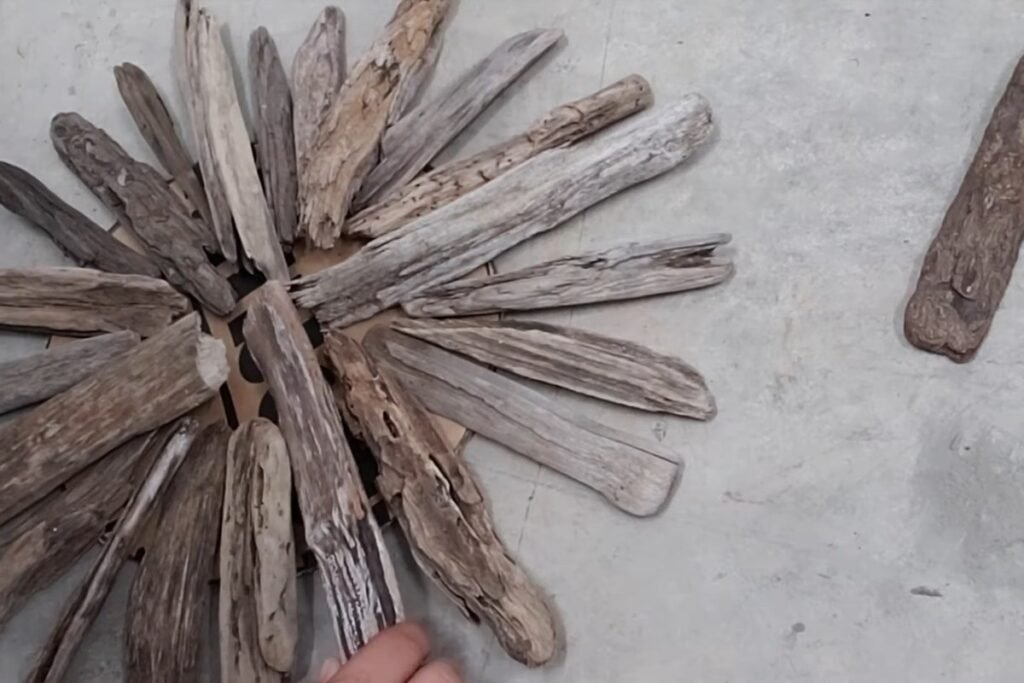
Step 5: Glue only at the touch points
Glue the four main arms first. Put the glue where the wood actually touches: wood to cardboard on this layer, and wood to wood on the layers above. Driftwood is bumpy, so a line of glue along the whole stick mostly hangs in the air. Glue on the real contact points holds far better.
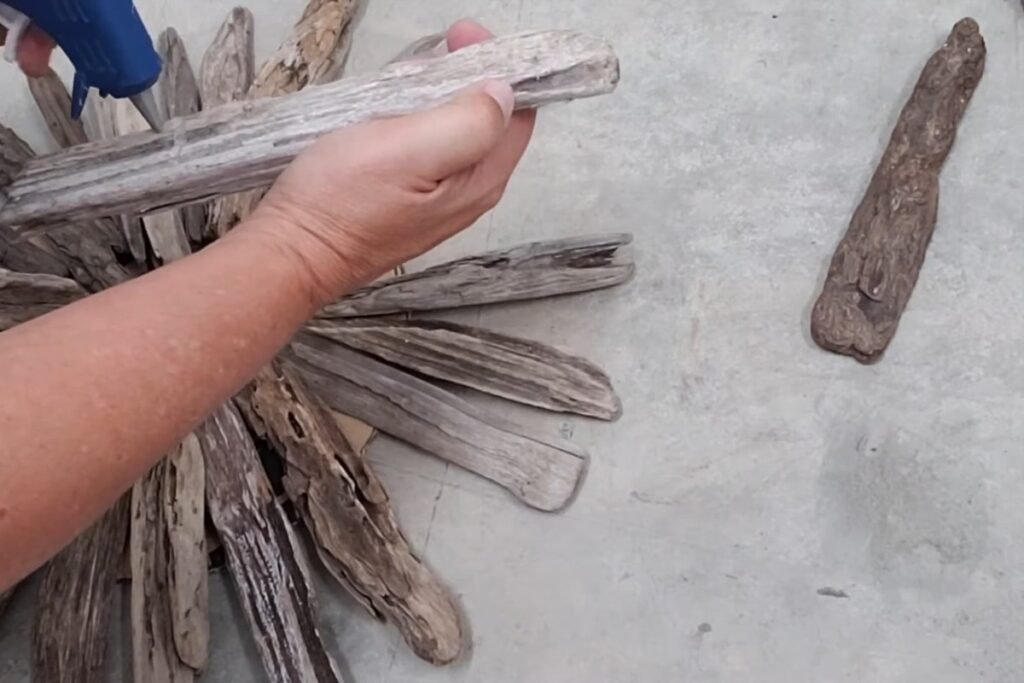
Step 6: Add the side pieces a little shorter
Glue the dry-fitted side pieces between the arms. Make them a little shorter than the four main arms, and keep their overhang even with each other so the outline stays round.
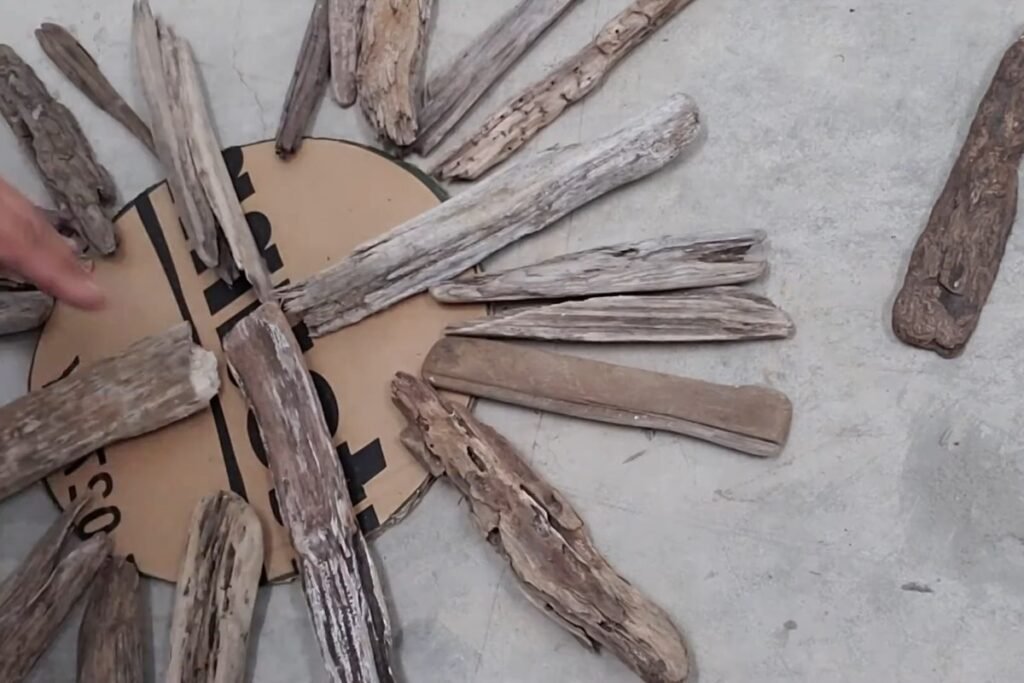
Step 7: Add extra glue where it will be hidden
Where pieces touch each other in spots that later layers will cover, add a little extra glue for strength. Keep visible joints neat; the goal is to see no glue at all on the finished piece.
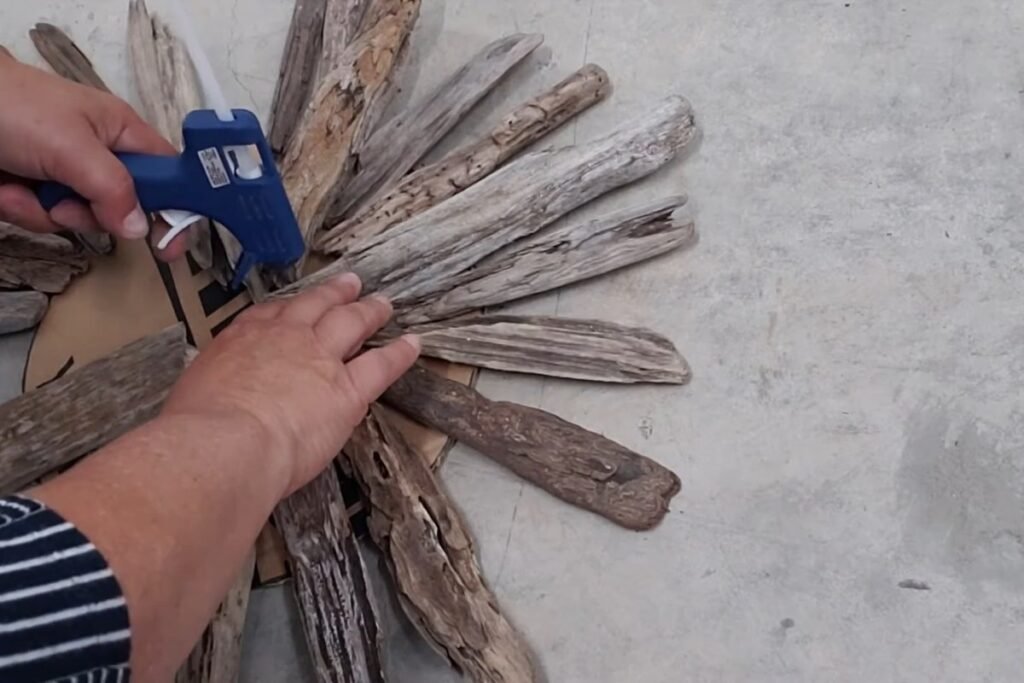
Step 8: Finish the first layer
Fill the rest of the ring the same way until the cardboard is mostly hidden from the side. Some card will still show between the arms; the next layer covers it.
Step 9: Flip it and screw through the main arms
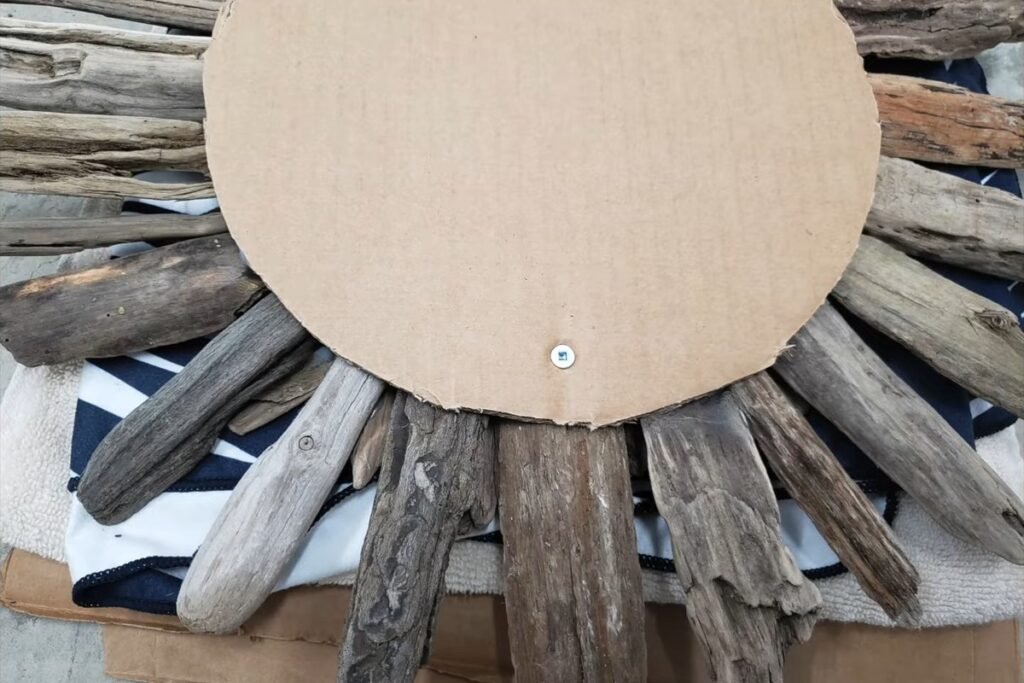
Turn the piece face down onto something soft, like a towel. Drive one screw through the cardboard into each of the four main arms (one or two may be enough). Choose a screw long enough to bite into the wood but short enough that it does not poke out of the front, because more layers will sit there. Keep a hand under the arm you are drilling into so it stays steady.
Step 10: Fit the hanger
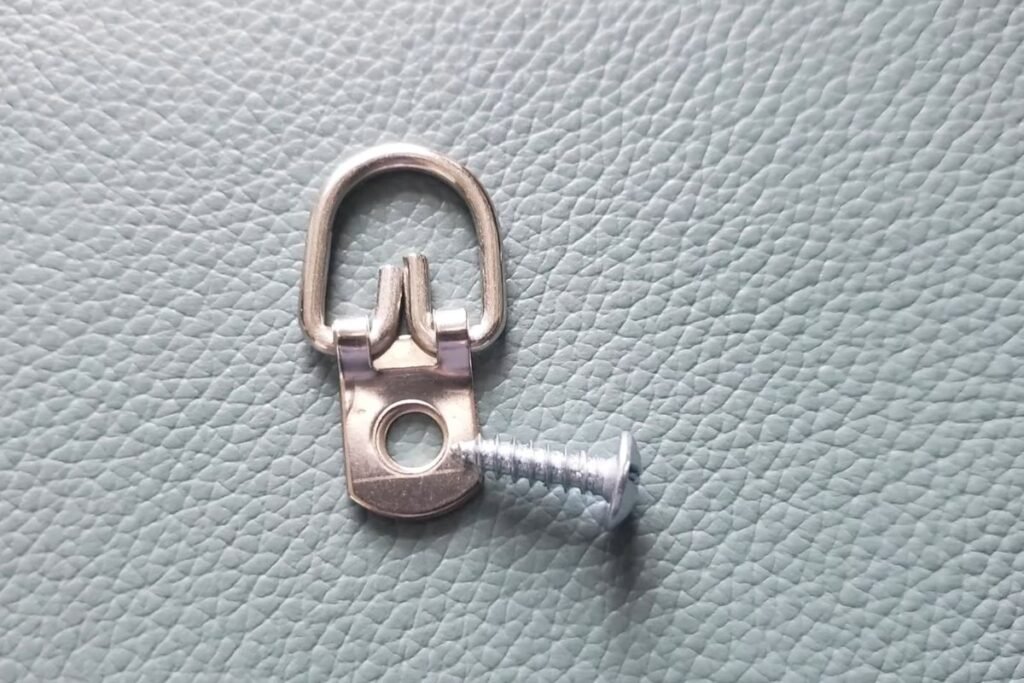
Screw a D-ring or sawtooth hanger to the back near the top, into one of the arms rather than into cardboard alone. If you would rather not use screws, adhesive picture-hanging strips are an alternative; check the weight they are rated for first. Then flip the starburst back over.
Step 11: Layer two: fill the gaps between the arms
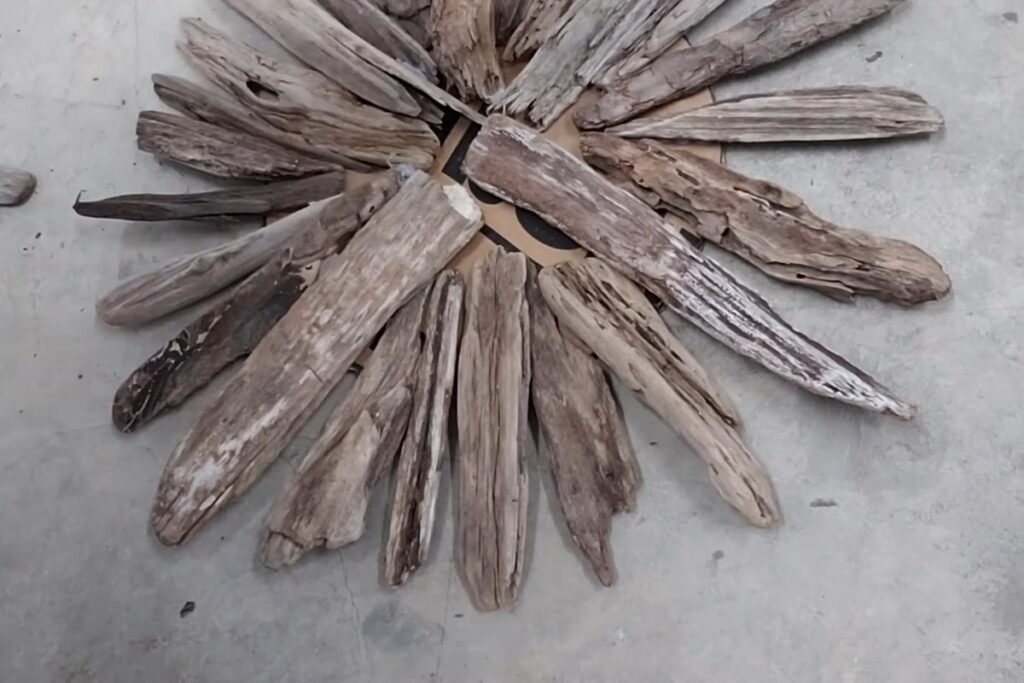
For the second layer, look for the gaps where cardboard still shows between the arms and lay a piece over each one. This hides the base and makes the burst look fuller. Set every piece the same distance in from the tips of the first layer, an inch or two, and keep that distance consistent all the way round before you glue.
Step 12: Layer three: shorter pieces, closer in
Choose slightly smaller pieces again and glue them so they still point outward and keep the starburst shape. Keep them consistent in how far they stand back from the layer below. Start closing in on the open centre, because the last pieces need something to sit on.
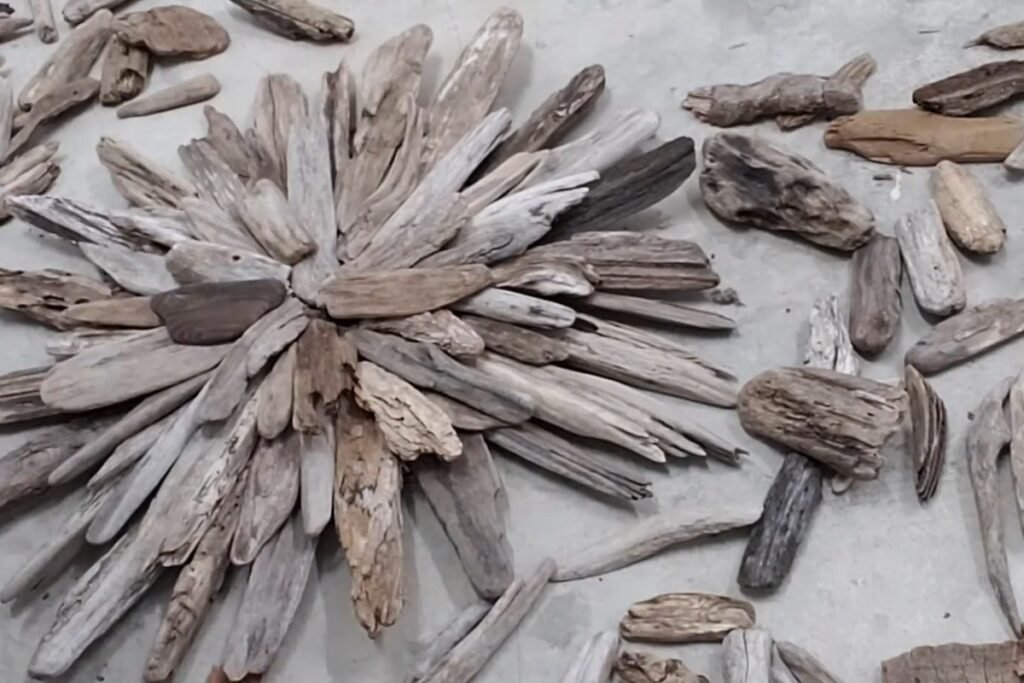
Step 13: Fill the centre hole
By now there will be a hole in the middle. Fill it with a flat piece so the top layer has something to rest on.
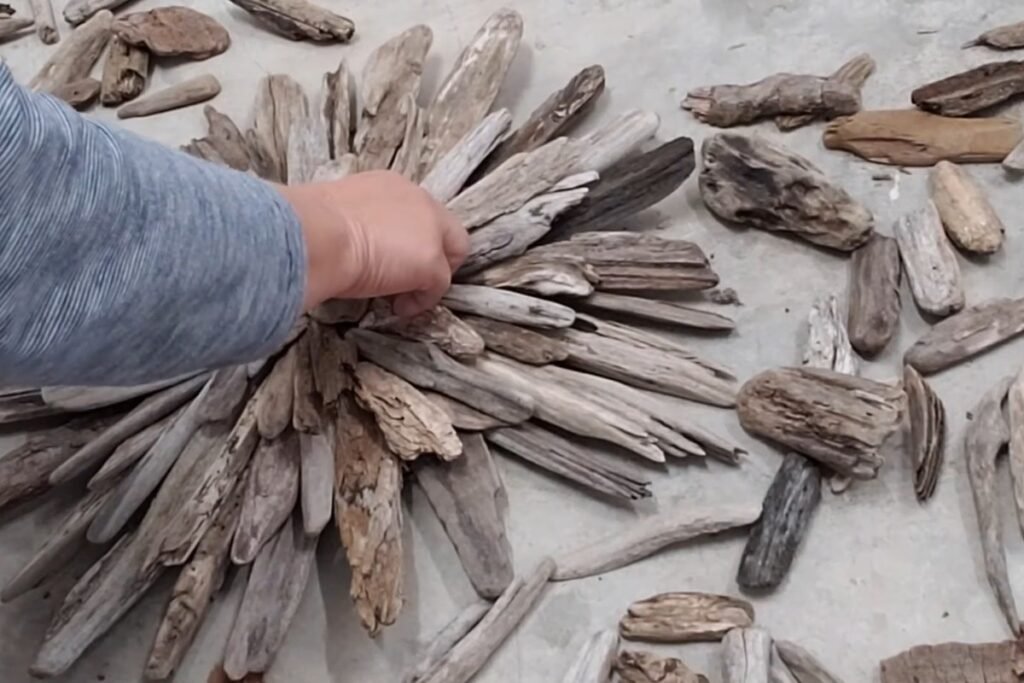
Step 14: Layer four around the centre
Work the fourth layer the same way, with short pieces set closer together. If a gap is still left in the centre, either cover it with one larger piece or carry on with a fifth layer of even smaller pieces until it closes.
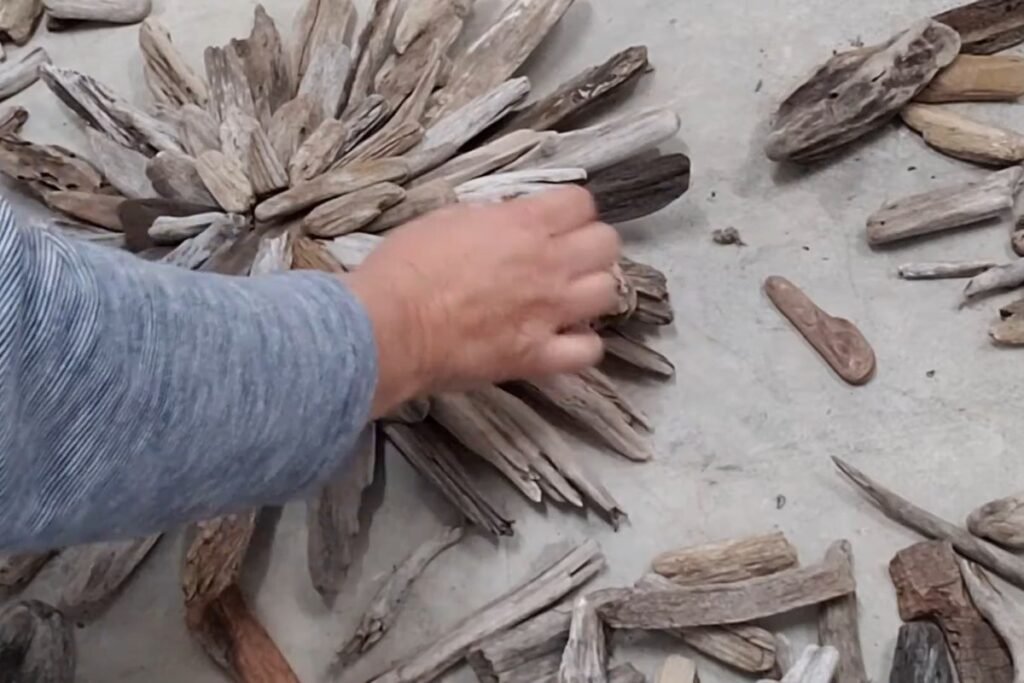
Step 15: Set the centre piece
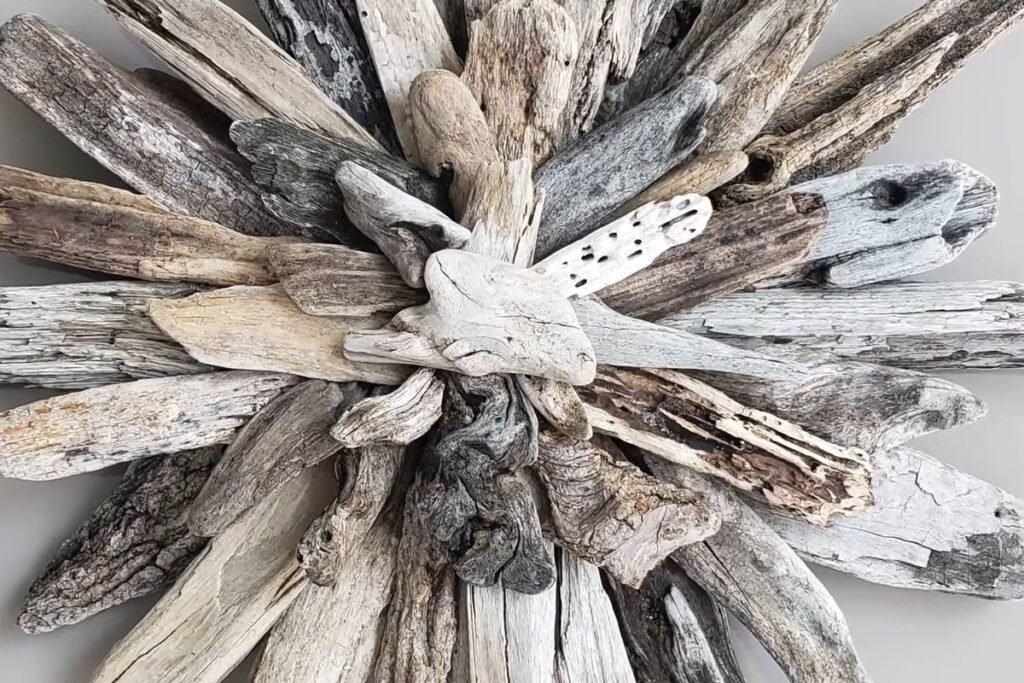
Glue your chosen feature piece over the middle to hide the last of the hole. A knotted, cork-like chunk reads well here because it contrasts with the long smooth arms.
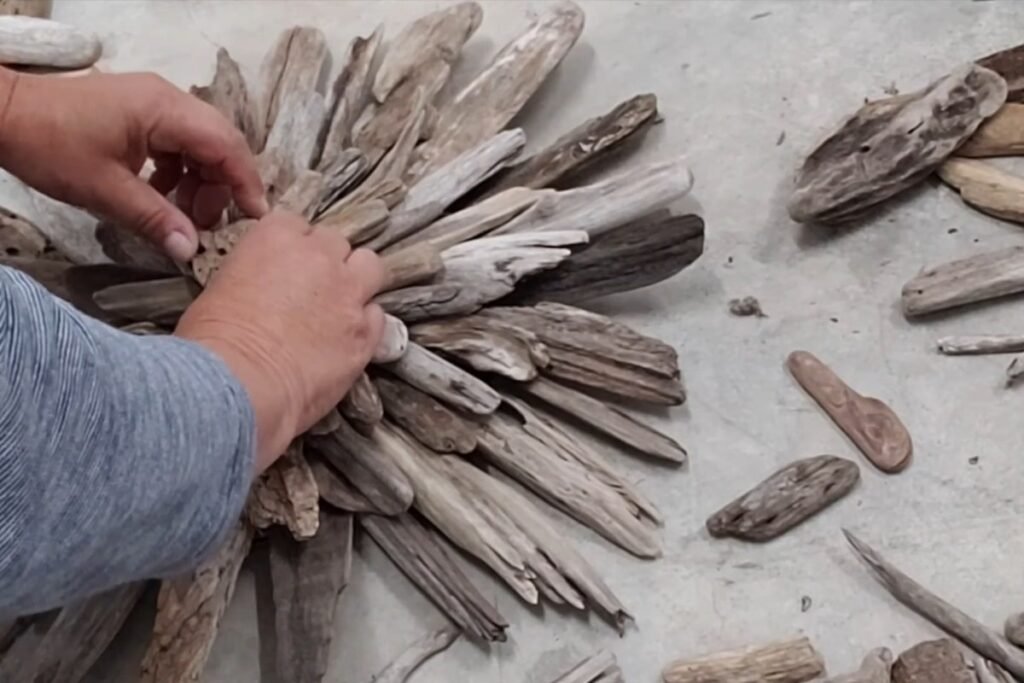
Step 16: Check the layers and hang it
Look at the piece from standing height. Each layer should stick out by the same amount all the way round. Pull any stray glue threads away, then hang your new coastal wall decor on a hook rated for its weight.
Where a Driftwood Starburst Usually Goes Wrong
Most problems with driftwood coastal wall decor come from rushing the preparation, not from the gluing itself.
- Wet or damp wood. Hot glue does not bond well to moisture, and damp wood can go mouldy behind the glue. Fix: dry every piece completely before you start, even if it looks dry on the outside.
- Glue in the air. A bead along the full length of a curved stick only touches at two or three points. Fix: find the touch points by rocking the piece, and glue only there.
- Uneven arms. One long arm makes the whole piece look lopsided on the wall. Fix: measure the four main arms before gluing and keep each later layer the same distance back.
- Cardboard showing. Gaps in layer two leave brown wedges visible from the side. Fix: lay a piece over every gap before you glue, and look at the piece from an angle.
- Screws that poke through. A screw that is too long pushes out of the front of an arm. Fix: hold the screw against the cardboard and wood stack before driving it; it must be shorter than both together.
Make This Coastal Wall Decor Your Own
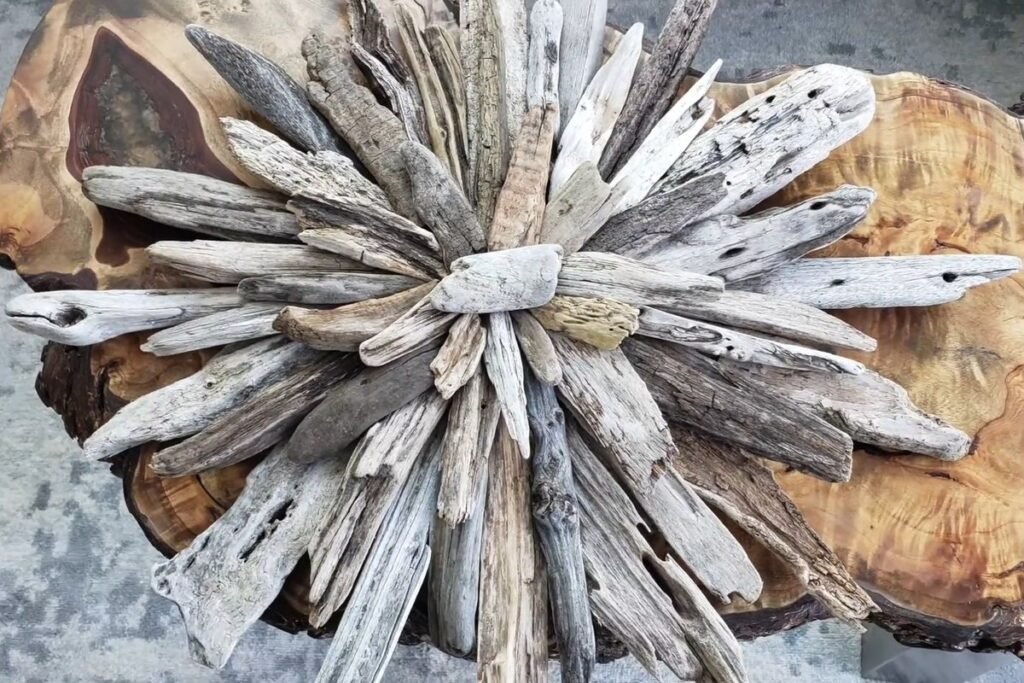
The same layering method works for very different looks, which is what makes it such flexible coastal wall decor.
- Pale and bleached. Use only the lightest grey and white pieces for sun-bleached coastal wall decor with a beach-house feel.
- Bigger or smaller. Keep the ratio: base circle about half the finished width. A 6 in circle with 3 in arms gives a 12 in starburst for a shelf or a small wall.
- Other rooms. A darker, browner mix suits a cabin or a rustic wall decor scheme, while pale wood fits a bright lake-house living room.
If you like natural materials on the wall, the lake home decorating ideas guide shows how to pair pieces like this with textiles and lighting, and the DIY doily wall decor projects use the same cheap, found-material approach with a softer result.
Safety and Renter Notes
A few simple precautions keep this coastal wall decor safe to make and safe on the wall.
- Hot glue burns. High-temperature guns dispense glue at around 350°F and low-temperature guns at around 250°F, so a low-temp gun is the gentler choice if children are helping. If glue lands on skin, the NHS advises holding the burn under cool running water for 20 minutes and not using creams, butter or ice.
- Drilling into the arms. Work face down on a towel, keep your supporting hand away from the line the screw will travel, and check the screw length against the cardboard and wood before you drive it.
- Weigh it before you hang it. Put the finished piece on a bathroom scale and choose a hanger rated above that weight. Picture hangers are sold in ratings from 10 lb up to 100 lb, and a #8 self-drilling drywall anchor is rated to 30 lb in half-inch drywall.
- Renters. One picture hook leaves a single small hole that is easy to fill. Adhesive strips leave none, but check the rating on the pack: a Command sawtooth hanger is listed at 5 lb and Command Large Hanging Strips at 16 lb. Follow the maker’s instructions for wall surface and curing time.
- Placement. The tips are dry, splintery wood. Hang it out of reach of young children and pets, not above a bed or crib, and away from heaters, fireplaces and steamy bathrooms, where heat softens hot glue.
Where to Hang It
Driftwood carries so many greys, browns and creams that the starburst works on almost any wall. On a plain white or neutral wall it stands out as the one textured piece in the room, and against a coloured wall it picks up the paint shade around it.
Hang it alone at eye level over a console, a bed headboard wall in an adult room or a reading chair, and give it some empty space around it; coastal wall decor reads best when it is not competing with a busy gallery wall.
Coastal Wall Decor FAQ
How much driftwood do I need for a 20 inch starburst?
About 100 pieces of mixed lengths. You need at least four long pieces of roughly 10 to 12 inches for the main arms, plenty of medium pieces for the next layers, and short chunky pieces for the middle. Collect more than you think; the fitting works like a puzzle and some pieces will not sit flat.
Can I use cardboard as the base, or do I need wood?
Thick cardboard works for coastal wall decor this size, because the driftwood arms carry most of the structure once they are glued and screwed together. A piece of thin plywood or MDF cut to a 10 inch circle is a sturdier option if you plan a larger starburst.
Is hot glue strong enough for driftwood wall art?
Yes, when the wood is dry and the glue is placed on the actual contact points. Extra glue on joints that later layers will hide adds strength, and screws through the main arms hold the base and hanger.
How do I hang a driftwood starburst without nails?
Use adhesive picture-hanging strips or a strip-mounted sawtooth hanger rated for more than the finished weight. Weigh the starburst first: a Command sawtooth hanger is listed at 5 lb and Command Large Hanging Strips at 16 lb. Attach them to a flat area of the cardboard back and follow the maker’s surface and waiting-time instructions.
Is this coastal wall decor suitable for a bathroom?
It is better kept out of steamy rooms. Driftwood can absorb moisture and hot glue softens with heat, so a living room, hallway or bedroom wall is a safer place for it.
Sources
- NHS: Burns and scalds
- Gluegun.com: hot glue gun temperatures
- University of Kentucky Entomology: Thermal deinfestation of household items
- USDA Forest Service: Finding the balance between aesthetics and durability (wood weathering)
- PubMed Central: Arctic driftwood deposits
- National Park Service: Gulf Islands National Seashore FAQ
- California Code of Regulations, 14 CCR 4306
- Oregon Administrative Rules 736-026-0015
- Hillman #8 self-drilling drywall anchor rating
- Prices: Target and Staples product listings, checked October 2026
Project credit: this project idea comes from the DIY channel Natural Crafts & Recipes.