Dollar Tree Wall Decor and How to Make 4 Beautiful Pieces
These four Dollar Tree wall decor projects turn cheap craft-aisle supplies into pieces that look far more expensive than they are: a gold sunburst made of painted straws, a crinkled gold oval mirror, a five-piece mirror cluster cut from a metal tray, and a pair of gold and black plates mounted on empty picture frames. At big-retailer prices, buying every item new for all four projects comes to roughly $86 to $166, and a single project runs about $22 to $62. Dollar Tree itself typically prices items at $1.25 with some higher, so the parts you buy there can cost less, but we could not confirm the shelf price of each exact item.
Each Dollar Tree wall decor project below has numbered steps with a photo for every step, a materials list with price ranges, and honest notes about what the original maker never says: lengths, drying times, how many straws, how to hang the pieces. Where this guide fills a gap, it says so. Store stock varies, so treat the Dollar Tree names as a starting point rather than a promise.
In this guide
Quick Facts About These Dollar Tree Wall Decor Projects
| Project | What you make | Cost range | Difficulty | Wall weight |
|---|---|---|---|---|
| 1. Gold straw sunburst | A black wooden circle covered in gold straw rays with glitter balls | About $27 to $58 new (about $20 to $47 if you already own a glue gun) | Easy: painting, cutting, gluing | Light |
| 2. Crinkled gold oval mirror | An oval mirror in a wavy, crinkled gold frame built on cardboard | About $22 to $50 new, plus a larger mirror sheet if yours is bigger than a small pack (about $15 to $39 with a glue gun you own) | Easy to medium: patience with glue and wrap | Light |
| 3. Five-piece mirror cluster | Five rounded-triangle mirrors on a black foam frame | About $41 to $56 new at big-retailer prices (the metal tray is the biggest cost; a discount-store tray may be cheaper) | Medium: cutting a metal tray and foam board | Light to medium |
| 4. Gold and black plate art | Two painted plates glued onto empty picture frames | About $27 to $62 new (the spray paint and plates are most of it; two plain frames are cheap) | Easy to medium: masking and spraying | Medium (a plate plus a frame) |
The original project does not give clock times, drying times or the weight of the finished Dollar Tree wall decor, so the table does not either. Plan on a relaxed weekend for all four, with spray paint drying overnight, and treat that as our estimate, not the maker’s. All four are light enough for a screw or a sturdy hanger on a wall; renters can use removable hooks rated for the weight (see the safety section).
A note on the name: Dollar Tree is mentioned because the maker uses items sold there (the tray is labelled as a Dollar Tree tray). This site is not affiliated with, sponsored by or endorsed by Dollar Tree, and we earn nothing from it. Prices and stock change by store, so check what your local shop carries.
Materials and Tools for Dollar Tree Wall Decor
Everything for this Dollar Tree wall decor is ordinary craft-aisle or kitchen-aisle stock. Prices are typical US ranges at large retailers in 2026 and vary by store, brand and pack size; the budget swap column shows where you can spend less. Items shared between projects are listed once.
| Item | Used in | Price range | Budget swap |
|---|---|---|---|
| Unfinished wooden circle (the maker’s has a twine hanger loop) | 1 | About $1 to $8 per circle (cheaper in multi-packs) | A round wooden sign blank or a round cut from thin plywood |
| Black craft paint and a brush | 1, 3 | About $1 to $3 per 2 oz bottle | Any black acrylic |
| Jumbo plastic straws, mixed colors | 1 | About $6 to $14 per pack of 100 | Any wide straws; the color is hidden under the gold |
| Clear tape | 1 | A few dollars per roll | Masking tape also holds a straw mat together |
| Metallic gold spray paint | 1, 2, 4 | About $6.50 to $13 per 11 oz can | One can can cover the straws and the plates if you work lightly |
| Black spray paint | 4 | About $6.50 to $13 per 11 oz can | Use black craft paint on the plates if you prefer a brush |
| Gold glitter balls (small and large) | 1 | About $5 to $9 per pack | Gold or silver craft balls; a bag usually mixes sizes |
| Hot glue gun and glue sticks | 1, 2, 3, 4 | About $7 to $11 for a mini gun with sticks | Borrow one; low-temp guns are gentler on foam |
| Flexible adhesive mirror sheet (oval) | 2 | About $4 to $8 for a pack of small self-adhesive acrylic sheets; a single oval the size shown was not priced | A thrifted plastic mirror cut to an oval (our suggestion); project 3 gets its mirrors from the metal tray instead |
| Cardboard from a shipping box | 2 | Free | Any flat, stiff box |
| Black marker and scissors | 2, 3 | A few dollars | Any marker that writes on cardboard and metal |
| White craft glue | 2, 4 | About $2 to $9 per 7.6 oz bottle (store brand is cheapest) | School glue works for the wrap step |
| Plastic food wrap | 2 | About $2 to $8.50 per roll | A roll of cling film; the cheapest roll is fine |
| Large round metal tray | 3 | About $22 to $26 for a plain stainless 14 to 16 in tray at a big retailer; the maker’s tray is labelled as a Dollar Tree tray and its price is not shown | A foil roasting-pan lid or a cake-board disc cut the same way (our suggestion) |
| Ruler and a pen or marker | 3 | A few dollars | A straight edge from your kitchen drawer |
| Black foam board, about poster-board size | 3 | About $3 to $6 per 20 x 30 in board | Black foam core from any craft aisle |
| Box cutter or utility knife with a fresh blade | 3 | About $7 to $10 | Sharp craft knife and a cutting mat |
| Small wooden hanger piece, binder clip | 2, 3 | A few dollars | A sawtooth picture hanger |
| Two large plastic plates | 4 | About $6 to $10 per pair (13 in plastic chargers, worked out from 6-pack prices) | Plastic charger plates in any color; they get painted |
| Masking tape and old newspaper | 4 | About $4 to $8 per roll | Painter’s tape gives sharper stripes |
| Two empty picture frames (glass and backing removed) | 4 | About $2 to $9 for two plain 8 x 10 to 11 x 14 frames | Thrift-store frames |
Project 1: Gold Straw Sunburst Dollar Tree Wall Decor
A black circle with gold rays fanning out from the centre is the easiest of the four Dollar Tree wall decor pieces to finish. It is also the project that most depends on patience, because every straw has to be cut to the same length and painted before any gluing starts. The maker uses jumbo plastic straws in mixed colors and sprays them gold, so the colors you buy hardly matter.
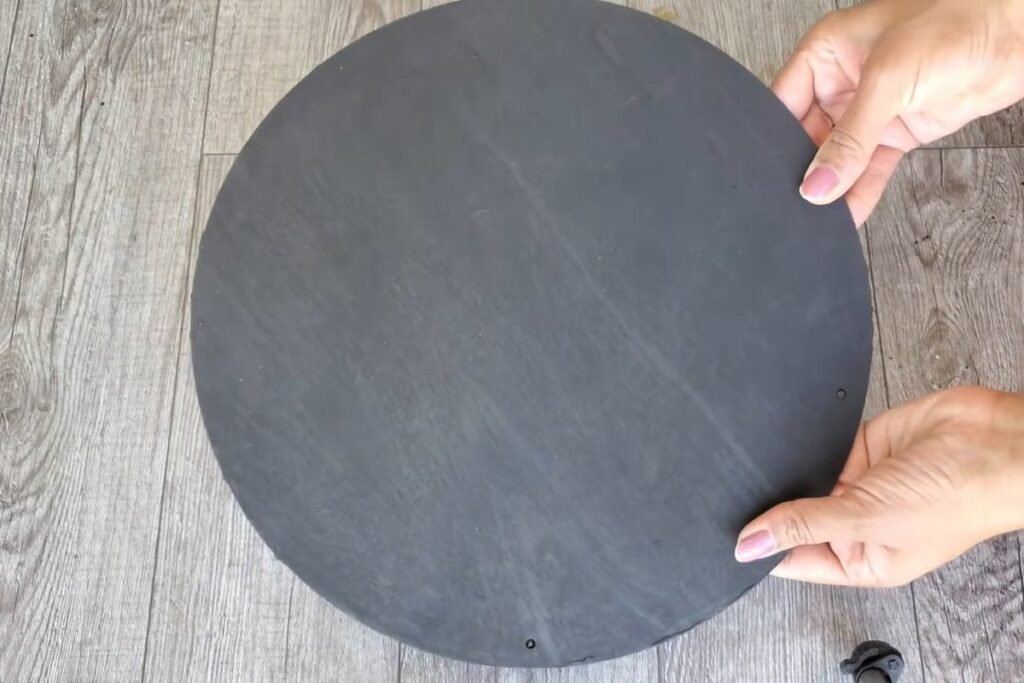
Step 1: Paint the wooden circle black
The maker starts with an unfinished wooden circle (it arrives with a twine loop for hanging) and paints one side with black craft paint, then sets it aside to dry. The project gives no drying time, so wait until the paint is dry to the touch on both sides before you glue anything to it. The black is the backdrop that makes the gold stand out.
Step 2: Cut the straws to the same length
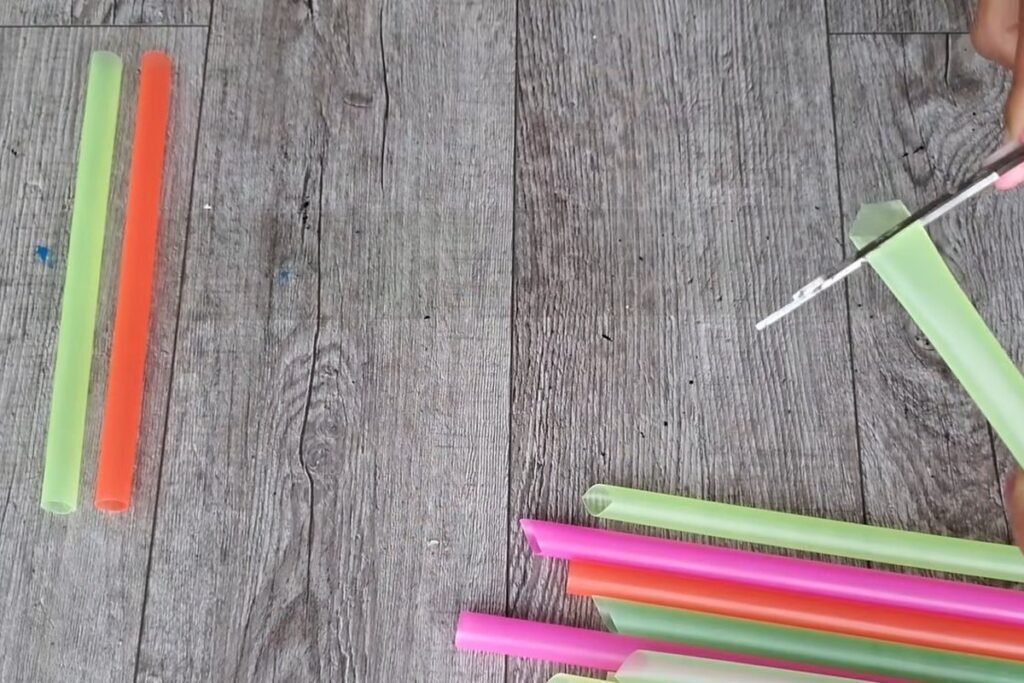
Cut one straw to the length you want, lay it on the table, and use it as your measure for the rest. The maker cuts the ends square with scissors so every ray ends up equal. The finished rays overhang the edge of the circle, so cut them a little longer than the circle’s radius. The exact length is not given, so test one straw on your own circle first.
Step 3: Line the straws up side by side
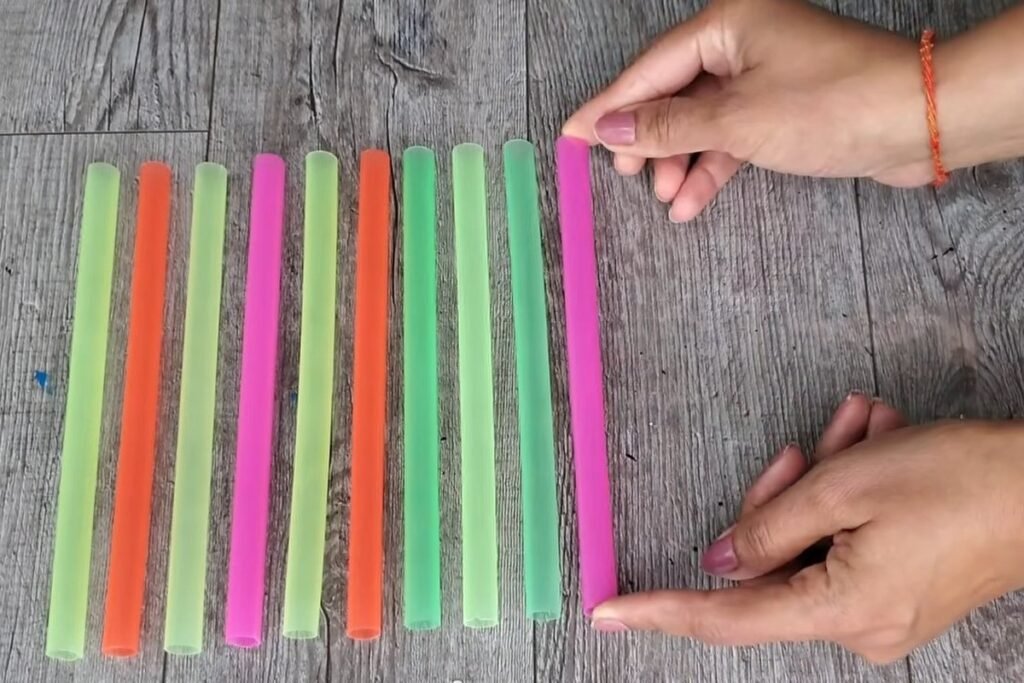
Lay the cut straws next to each other in one flat row, mixing the colors if you like. This row becomes a small mat, so you can paint all of the straws in one go instead of one at a time.
Step 4: Tape across the row so it holds together
Run tape across the straws so they act as one piece. The maker turns the strip over to reach the other side, so tape in a spot you can reach from both sides. Taping the straws together is what keeps them from rolling away when the spray hits.
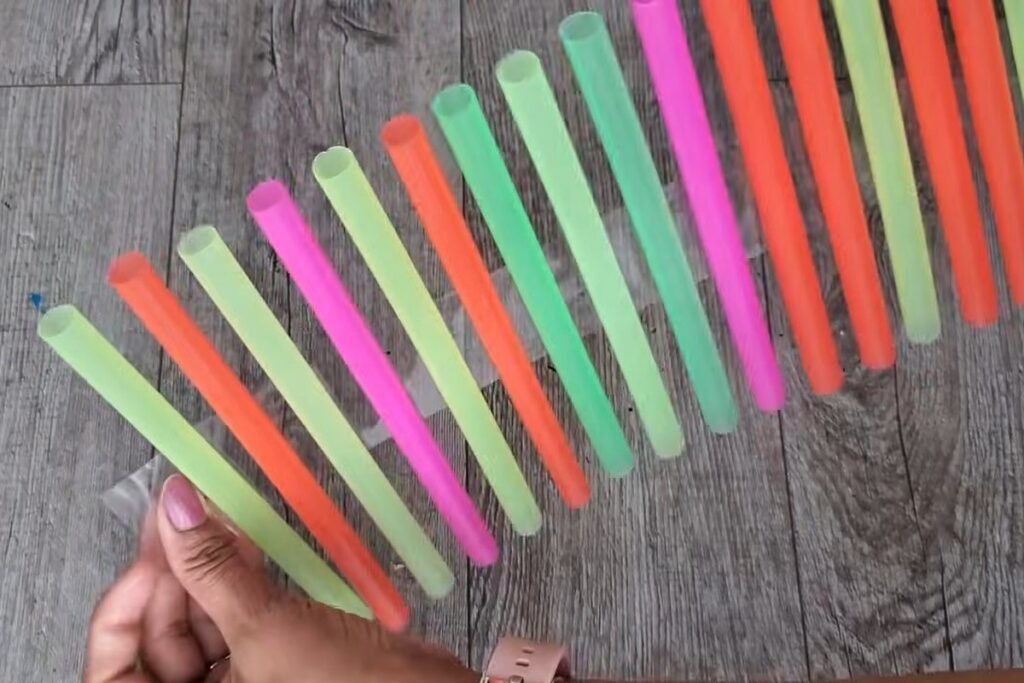
Step 5: Spray the straws gold
Spray the mat with metallic gold spray paint until the plastic is covered, turning the mat over for the other side. Work outdoors or in a well-ventilated spot, and let the paint dry fully before you handle the straws. The maker does not name the paint or the drying time, so follow the can for both.
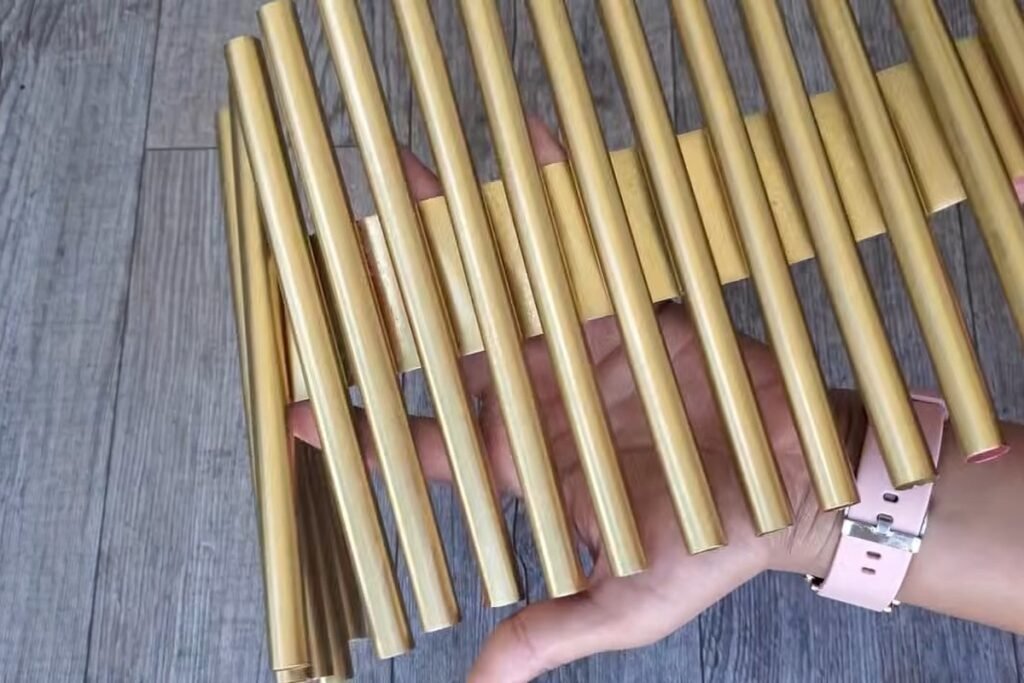
Step 6: Glue the first two straws to the circle
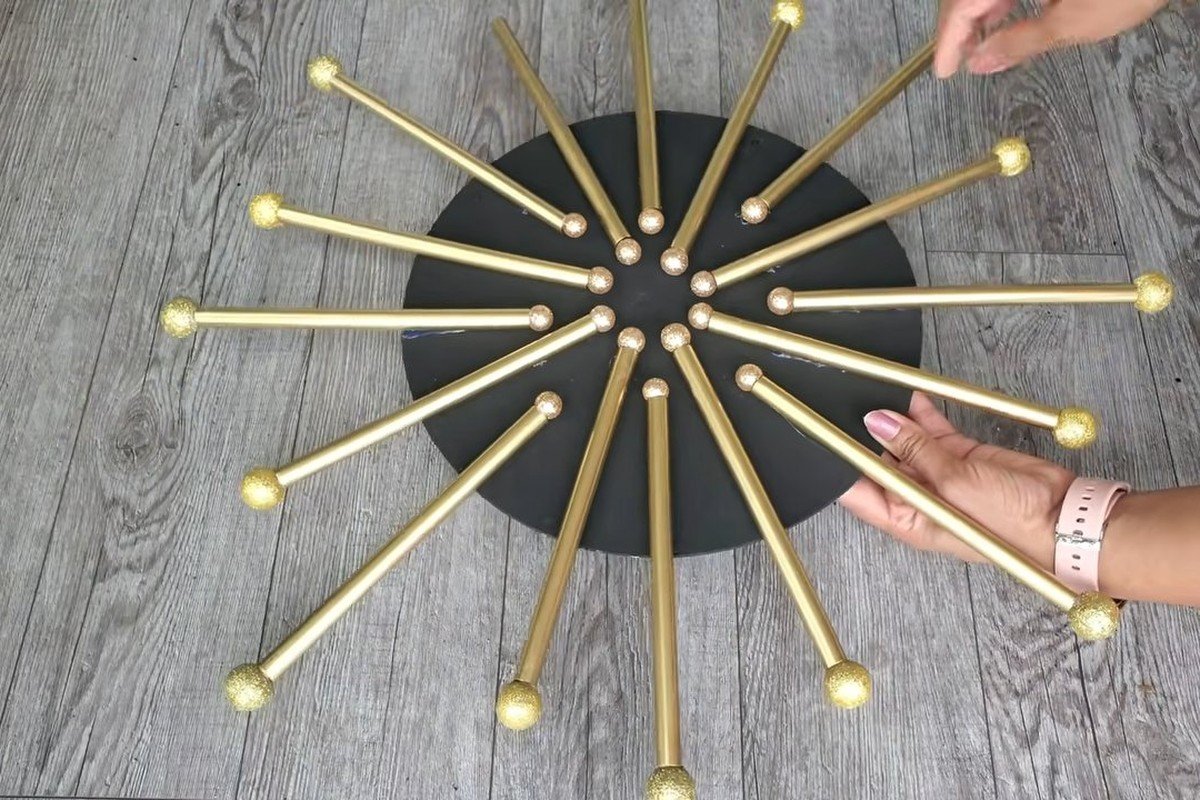
Cut the tape, separate the straws and glue the first two across the circle with a hot glue gun, on opposite sides along one line. They begin a little away from the middle and extend past the edge of the board. These first two set the angle for every other straw.
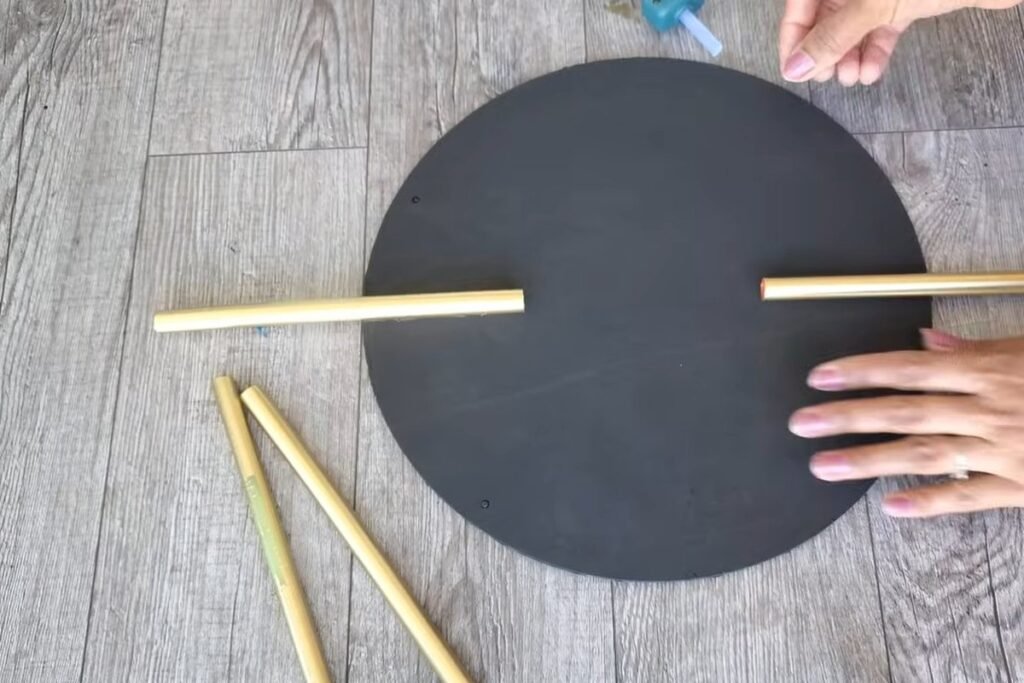
Step 7: Add the next two at a right angle
Glue the next two straws across the first pair, so the four straws form a plus shape. Four straws give you quarters to fill, which makes it far easier to space the rest evenly than working from one straw.
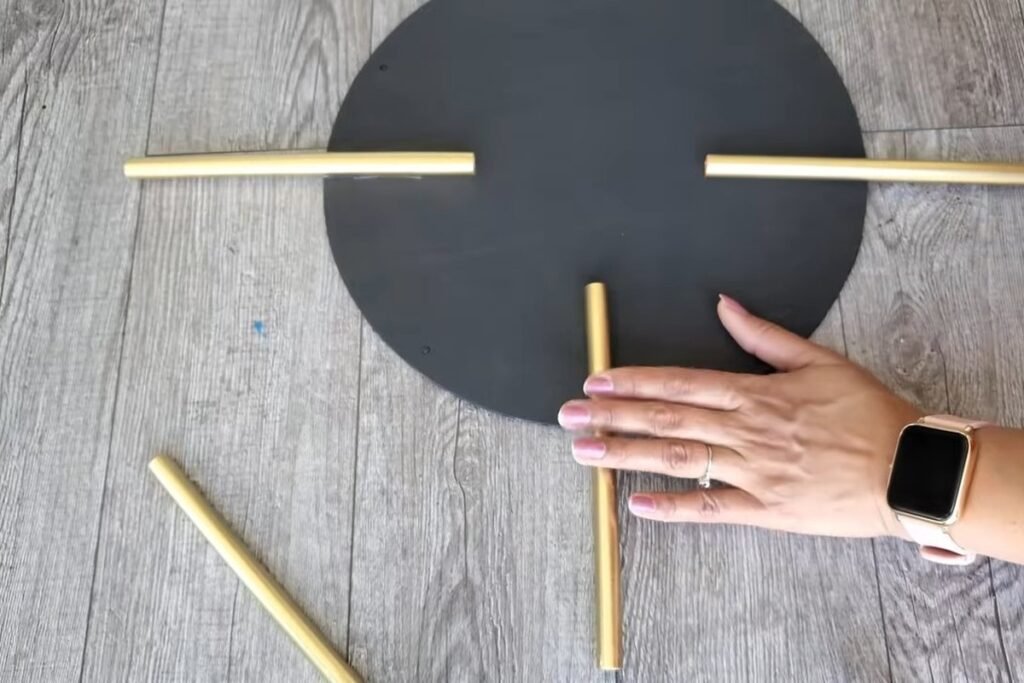
Step 8: Fill in the rays around the circle
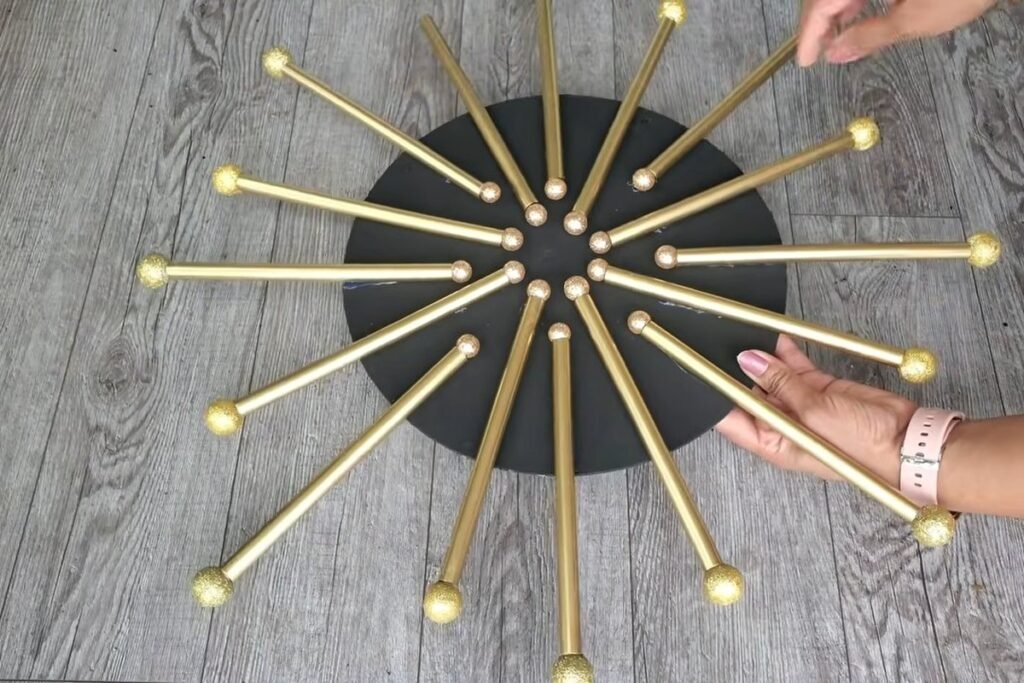
Keep adding straws between the existing ones, always placing the next one in the middle of the widest gap. The maker never states the straw count; the finished piece in the photos has around twenty rays (our count from the pictures).
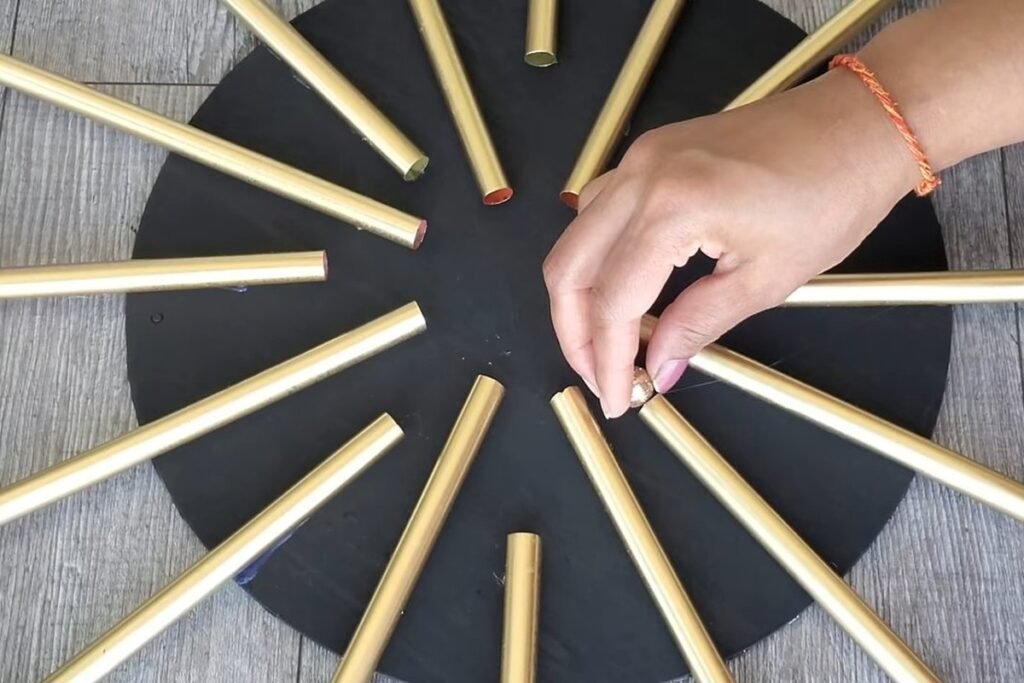
Step 9: Glue small glitter balls over the centre ends
A bag of glitter balls in mixed sizes and colors (silver and gold) supplies the finishing touch. The small ones go on the inner ends of the straws, where they cover the ragged tips at the centre of the circle and form a neat ring.
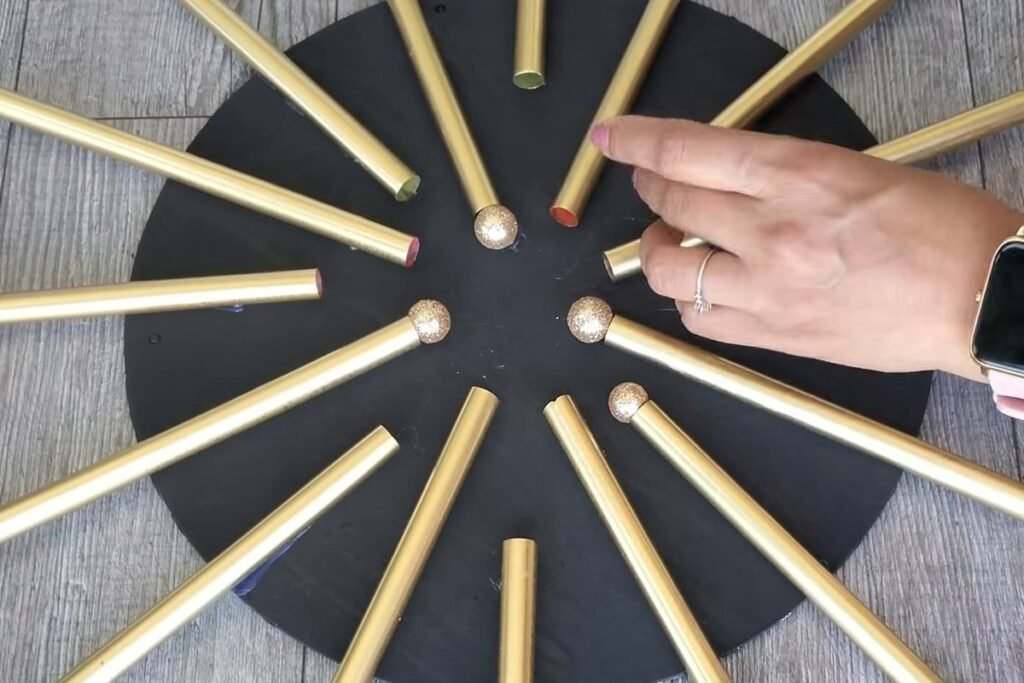
Step 10: Add the larger gold balls on the outer ends
Glue a larger gold glitter ball to the outer tip of every ray. This gives the finished sunburst its starburst look and also covers the cut ends of the straws. When the glue has cooled, the piece is ready to hang; the project does not show a hanging method, but the twine loop on the board, or a sturdy hanger on the back, will do.

That completes the first of the four Dollar Tree wall decor projects. The sunburst needs the fewest tools, so it is the best one to start with if you have never made Dollar Tree wall decor before.
Project 2: Crinkled Gold Oval Mirror
This is the showy one of the Dollar Tree wall decor set. Plastic wrap pressed into white glue dries into a stiff, wrinkled surface that catches light like hammered metal once it is painted gold. The frame is built on a cut cardboard base, with a flexible adhesive mirror sheet in the middle.
Step 1: Trace the mirror sheet on cardboard
Lay the oval mirror sheet on a flat piece of cardboard from a shipping box. The sheet is thin and flexible, which is why it is easy to handle and stick later. The maker uses the oval as the guide for the centre opening of the frame.
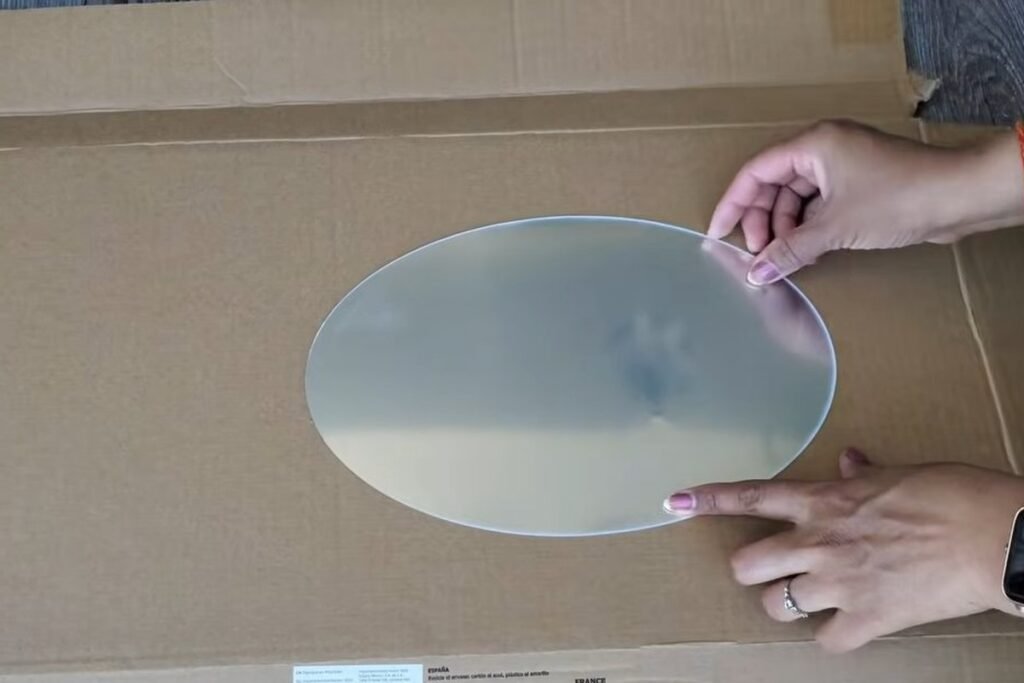
Step 2: Draw a wavy outline around the oval
Draw an irregular, wavy outline around the oval with a black marker, leaving a wide border. The maker calls this an abstract shape, which means there is no wrong way to draw it. Then cut along the outside line with scissors; the inner oval stays in place on the cardboard.
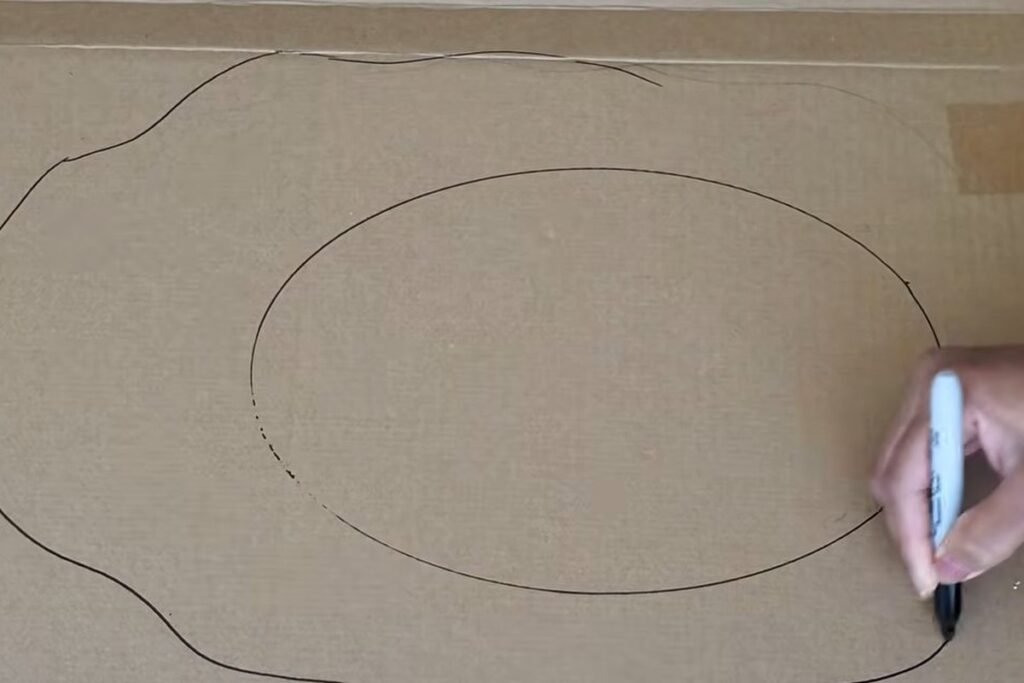
Step 3: Spread white glue over the border
Squeeze white craft glue onto the border of the cardboard and spread it with your fingers or a small piece of cardboard, covering the whole band between the oval and the outer edge. Leave the oval itself bare, since the mirror will cover it.
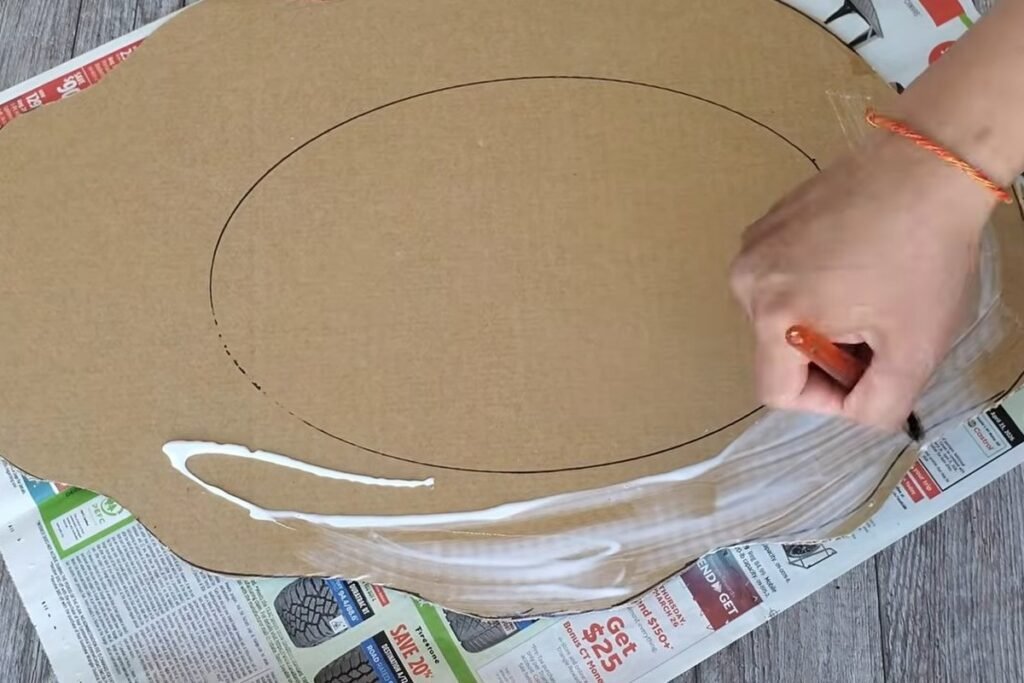
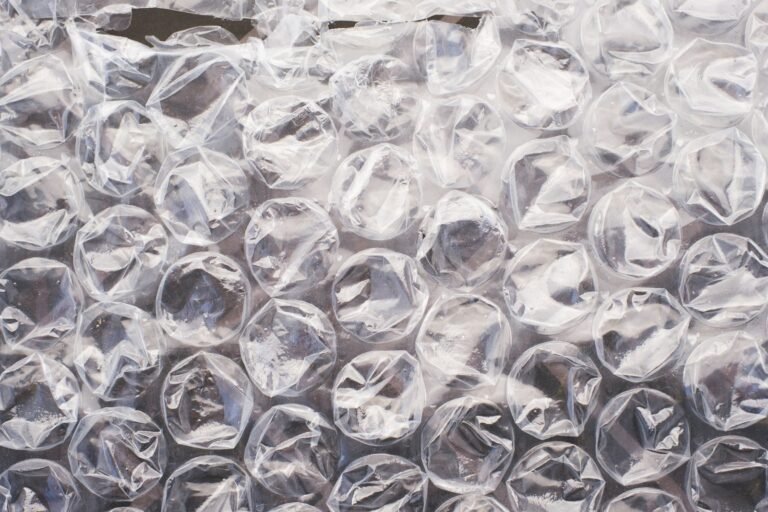
Step 4: Press crinkled plastic wrap into the glue
Tear off pieces of plastic wrap, scrunch them and press them into the glue so they stay in deep, random wrinkles. Add more glue and more wrap as you go around the border. The ripples should be uneven, with some tall ridges and some flat patches.
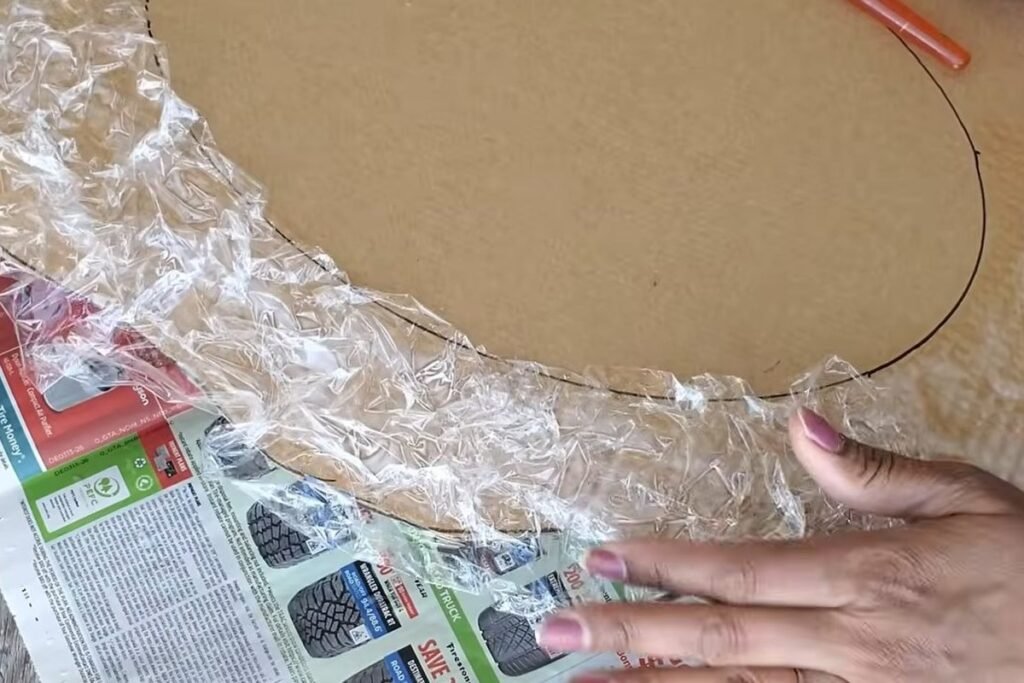
Step 5: Cover the whole border
Keep going until the entire border is covered and the wrap overlaps the outer edge. The more layers you build, the more texture the gold paint will show. Let the glue dry before the next step; the project does not give a time, so wait until the wrap feels firm.
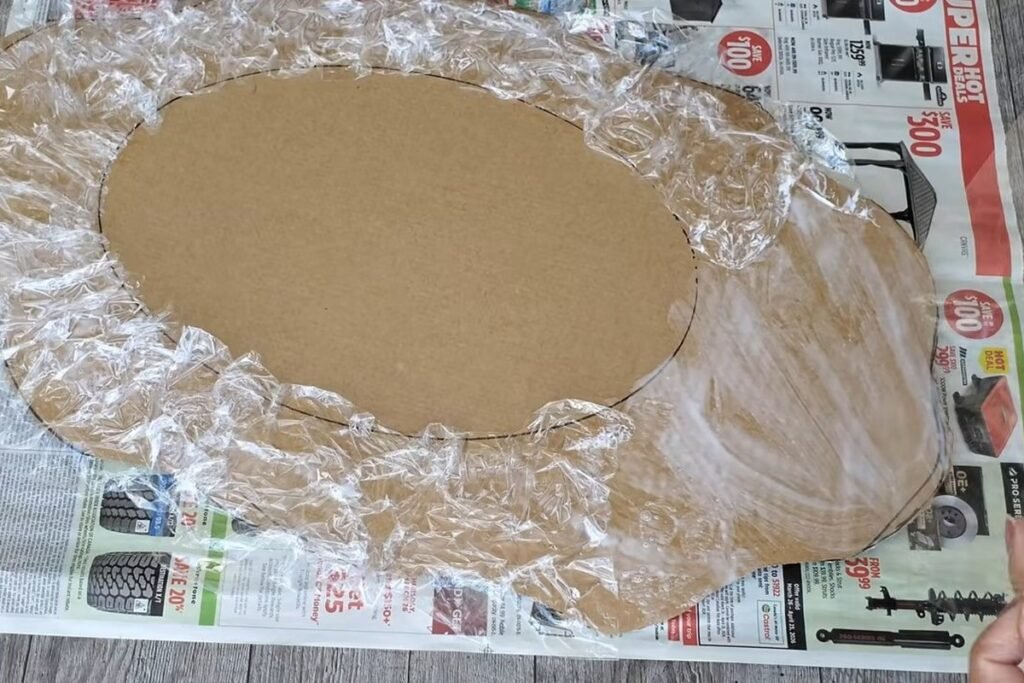
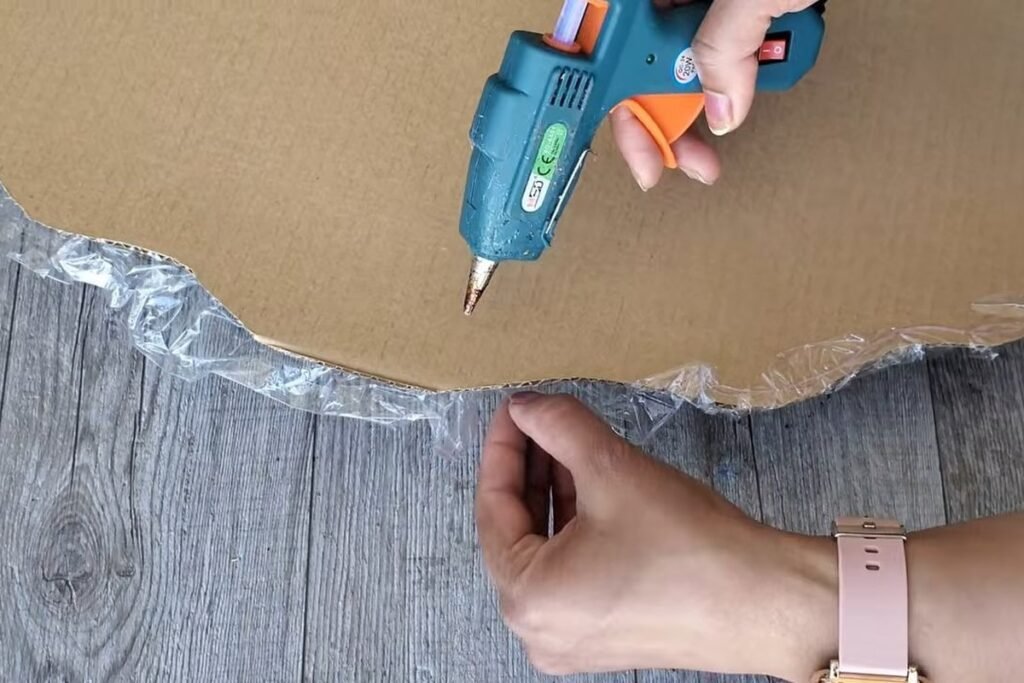
Step 6: Fold the wrap edges over and hot glue them behind
Turn the piece over and fold the overhanging wrap onto the back. Run hot glue along the folded edge to hold it. This leaves a clean outer edge from the front and stops the wrap from peeling away.
Step 7: Finish the frame in metallic gold
The next thing the project shows is the finished gold surface. The painting itself is not shown, but the sheen matches the metallic gold spray paint used in project 1, so that is the product we would use (our inference, not the maker’s statement). Work outdoors or somewhere well ventilated and let the paint dry before you handle the frame.
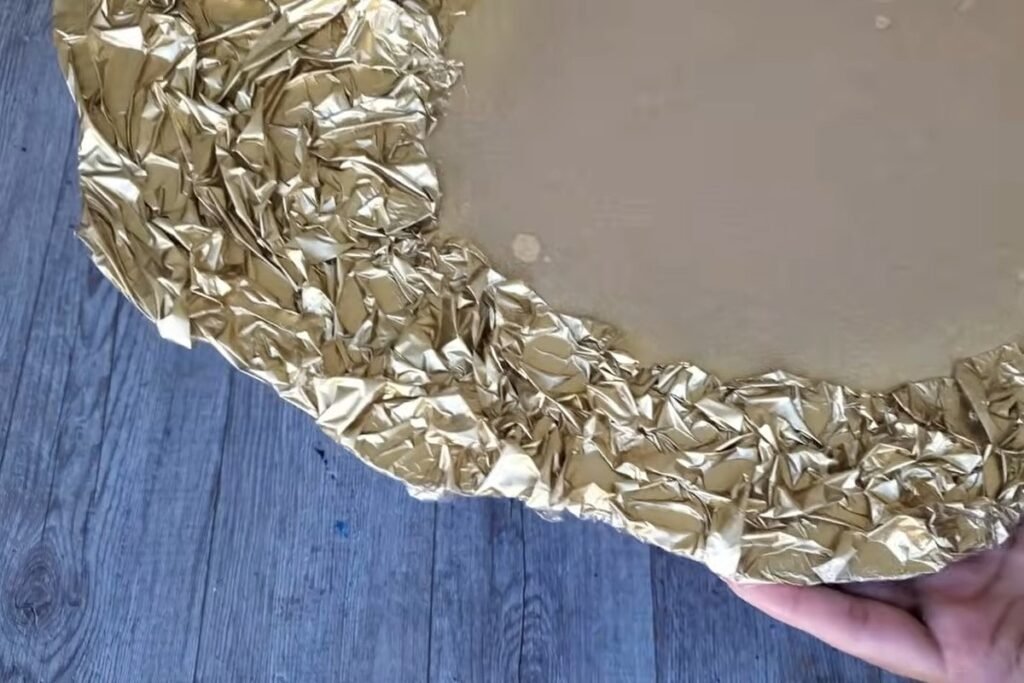
Step 8: Peel the backing off the mirror sheet
Peel the backing from the mirror sheet to expose its sticky side, holding it away from the frame so it cannot attach at the wrong angle. Once it touches the cardboard it will be hard to move.
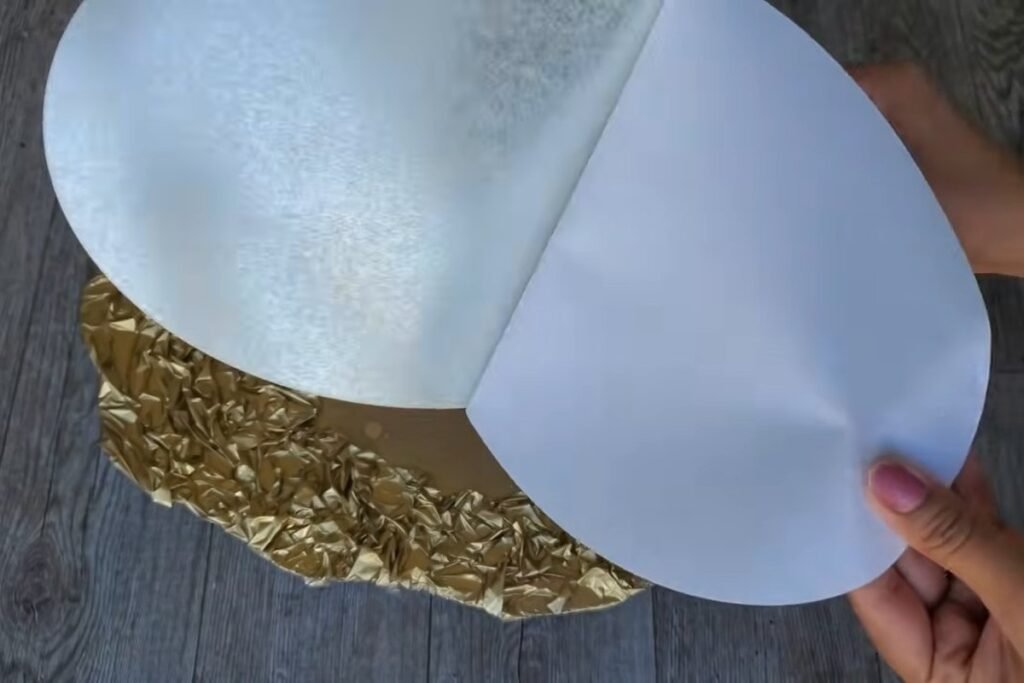
Step 9: Press the mirror into the centre
Lower the oval onto the bare cardboard in the middle of the frame and press it flat with your palm, working from the centre out. Check that the edges all sit just under the gold border.
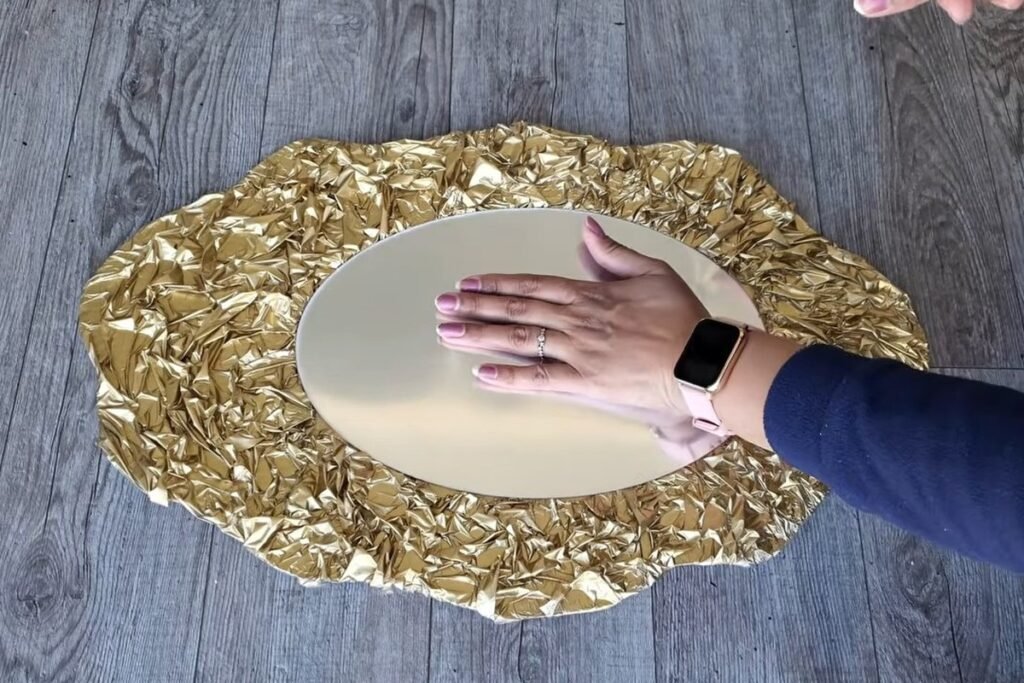
Step 10: Peel the protective film off the front
Pull the thin plastic film off the face of the mirror from a corner. Underneath is the reflective surface. A flexible mirror sheet is lighter than glass but shows small ripples, so judge the reflection from a distance.
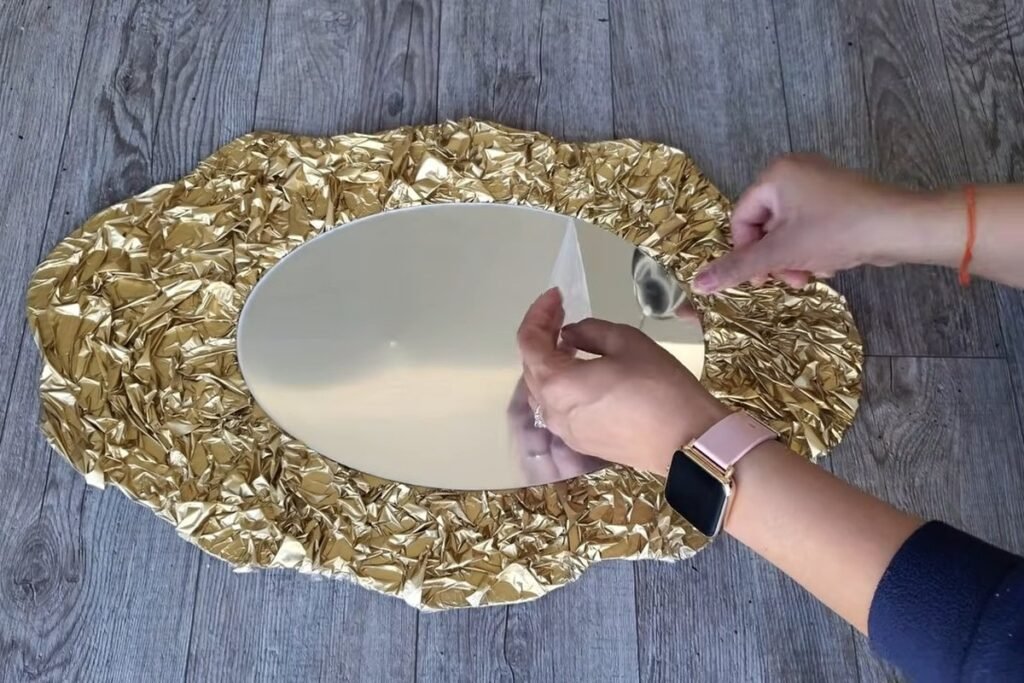
Step 11: Finish and hang it with a clip
The maker’s note on screen says to use a clip to hang it on the wall. How the clip is fixed to the back is not shown clearly, so we suggest hot-gluing or taping a clip securely, or using a sawtooth hanger. This piece is mostly cardboard and plastic, so it stays light.
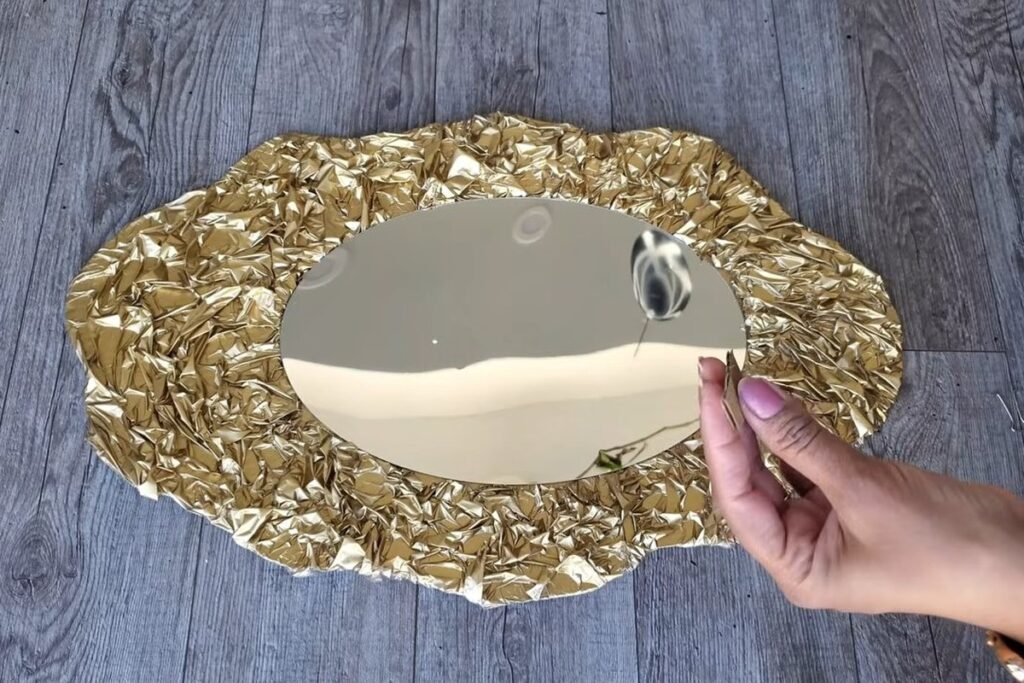
The oval mirror shows how far a roll of plastic wrap and a can of gold paint can go. Of the four Dollar Tree wall decor pieces it is the most forgiving, because every wrinkle looks intentional and nothing has to be exact.
Project 3: Five-Piece Mirror Cluster Made From a Tray
The third Dollar Tree wall decor piece is the most clever. Five rounded-triangle mirrors come out of a single metal tray, then sit in black foam frames that are glued edge to edge into one long, wavy wall piece. It is the project that needs the most care with blades, so read the safety section before you cut.
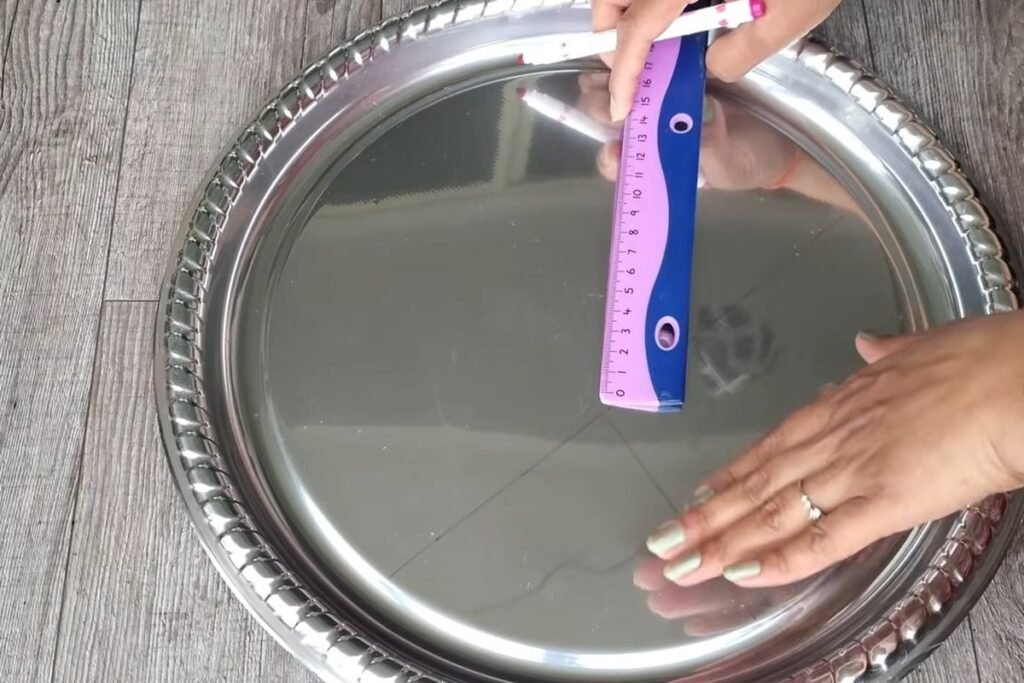
Step 1: Divide the metal tray with a ruler and marker
The maker starts with a large round metal tray labelled as a Dollar Tree tray. A ruler and a marker divide its flat middle into straight lines. The shiny surface acts as the mirror, so keep your fingers off it and mark only where you will cut.
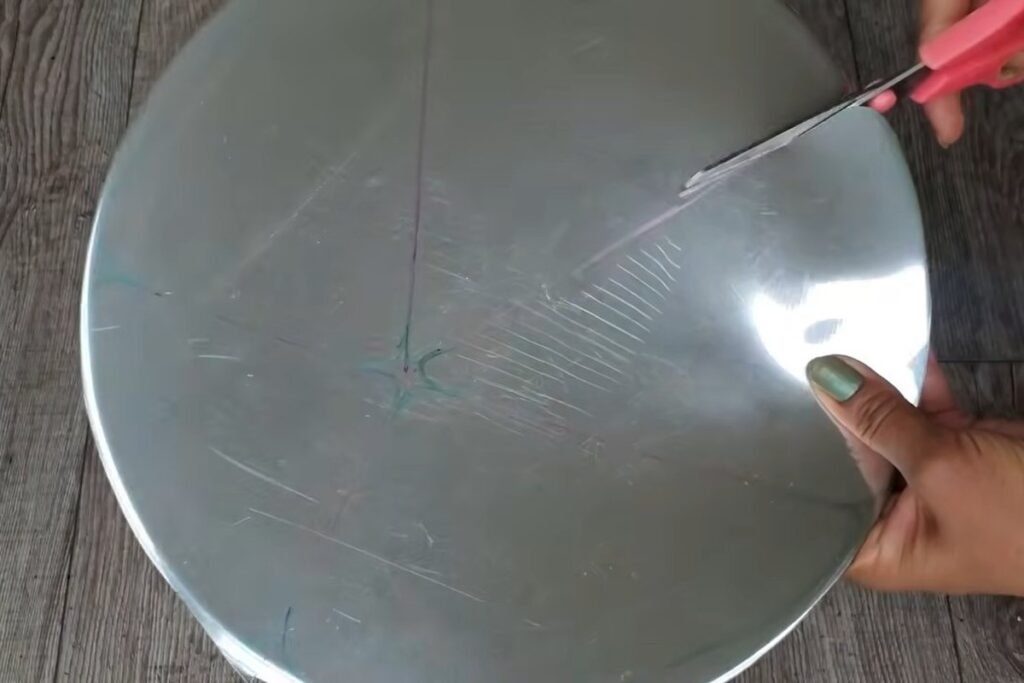
Step 2: Cut along the lines
Cut along the marked lines with sturdy scissors, turning the tray as you go. The metal is thin enough to cut this way. A simple rule applies here: round each corner after cutting, and file or tape any sharp edge.
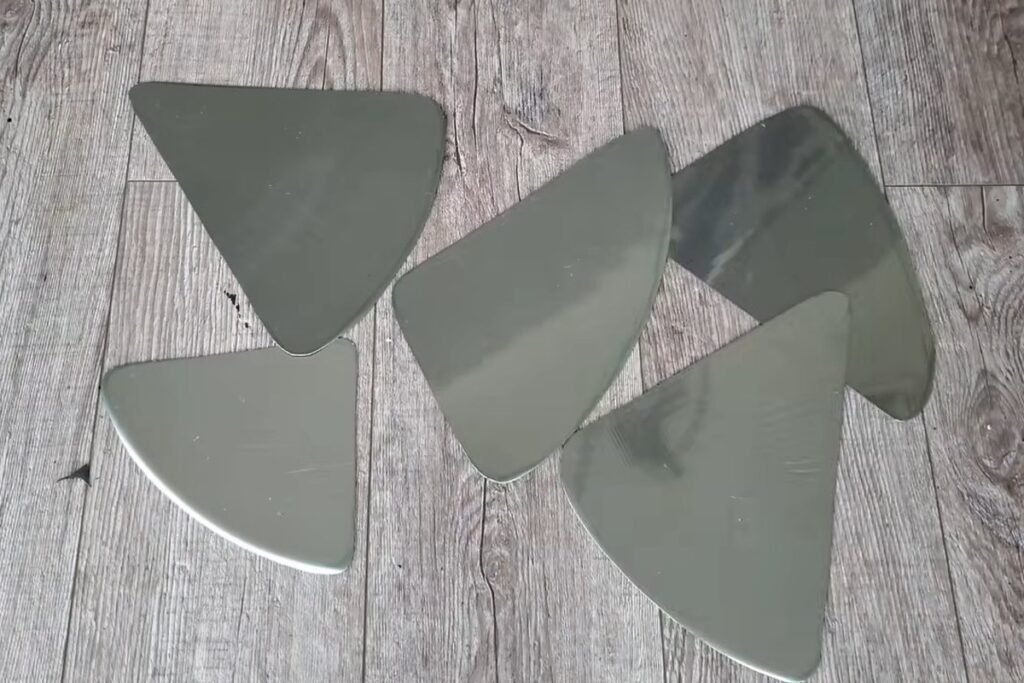
Step 3: Round off five triangle mirrors
The cutting leaves five rounded-triangle pieces of different sizes. Round the sharp points with the scissors. Their uneven sizes are part of the look.
Step 4: Lay the pieces on foam board
Place the mirror pieces on black foam board, with space around each, to plan the layout. The maker uses foam board, which is light and cuts cleanly with a blade.
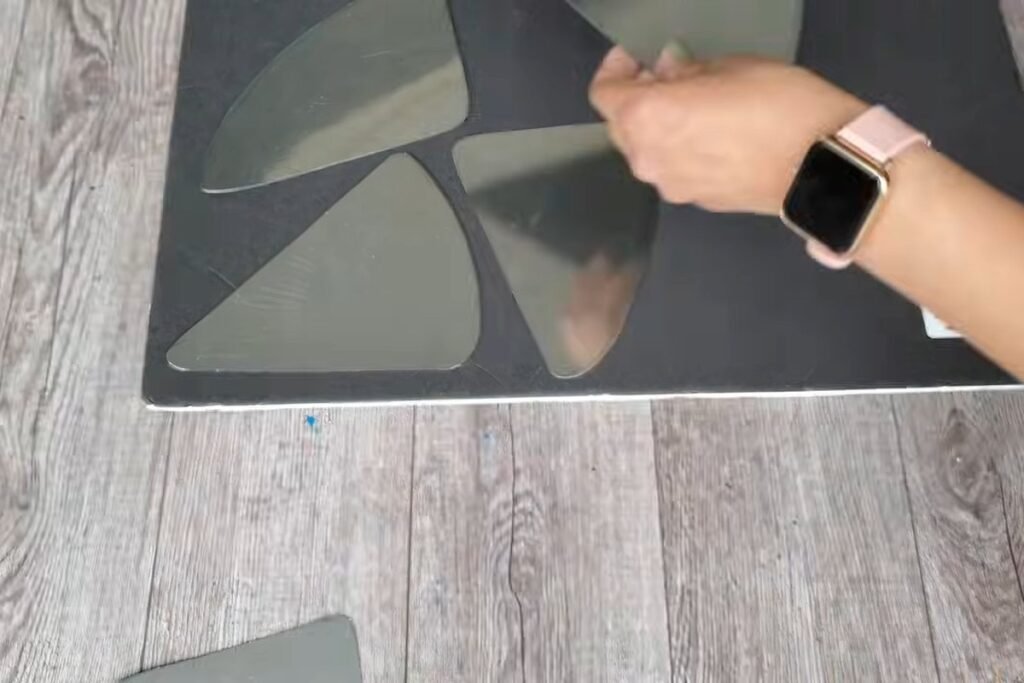
Step 5: Draw a larger outline around each piece
Draw an outline around each mirror piece, a little way out from its edge. These outlines become the foam frames, so keep the line smooth. Cut each shape from the foam board with a box cutter, cutting away from your body and changing to a fresh blade if it drags.
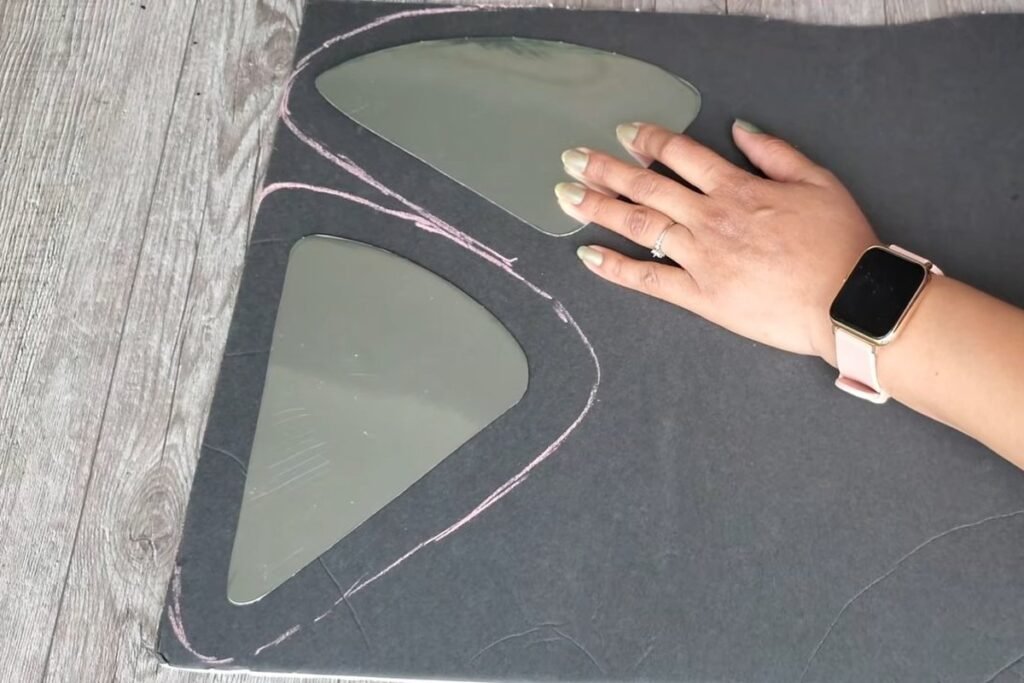
Step 6: Check the five foam shapes
Once cut, the foam shapes each become the frame of one mirror. Lay them in a row and pick the order that looks best. The maker alternates large and small shapes so the cluster reads as one flowing piece.
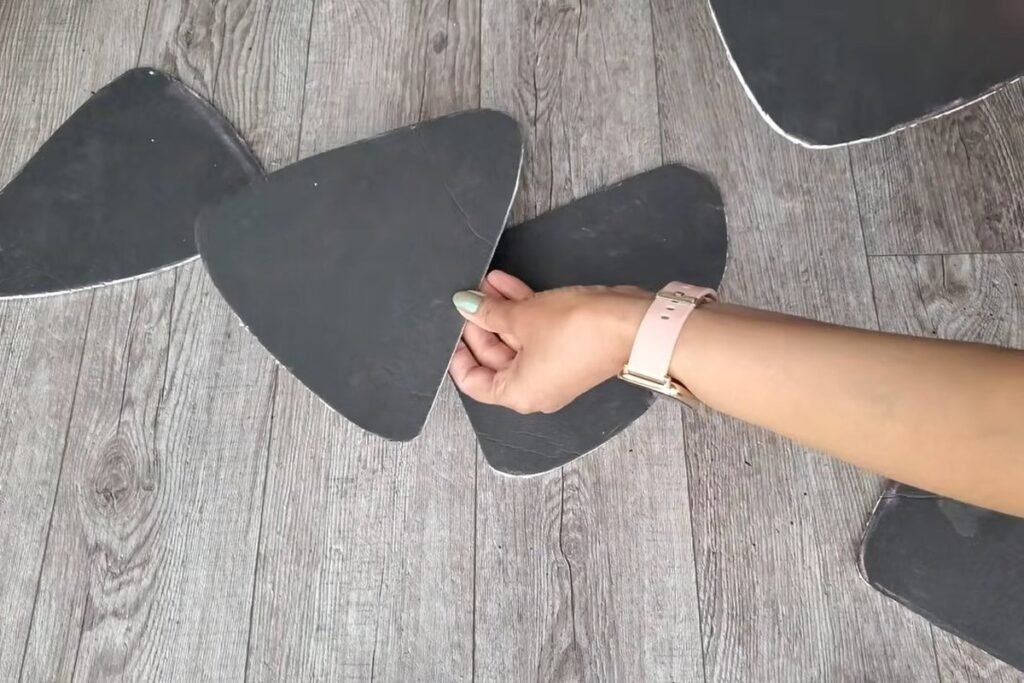
Step 7: Hot glue the foam shapes together
Glue the foam shapes edge to edge into one long chain with hot glue. Foam is light, so a thin line of glue holds it, and a low-temperature gun avoids melting the surface.
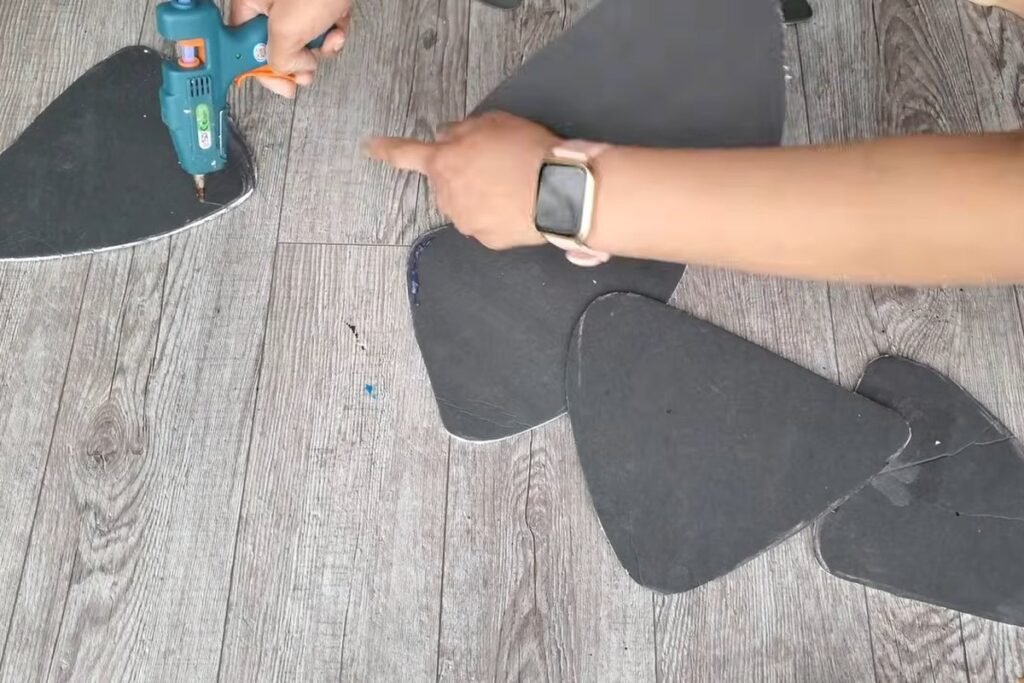
Step 8: Paint the foam rim black
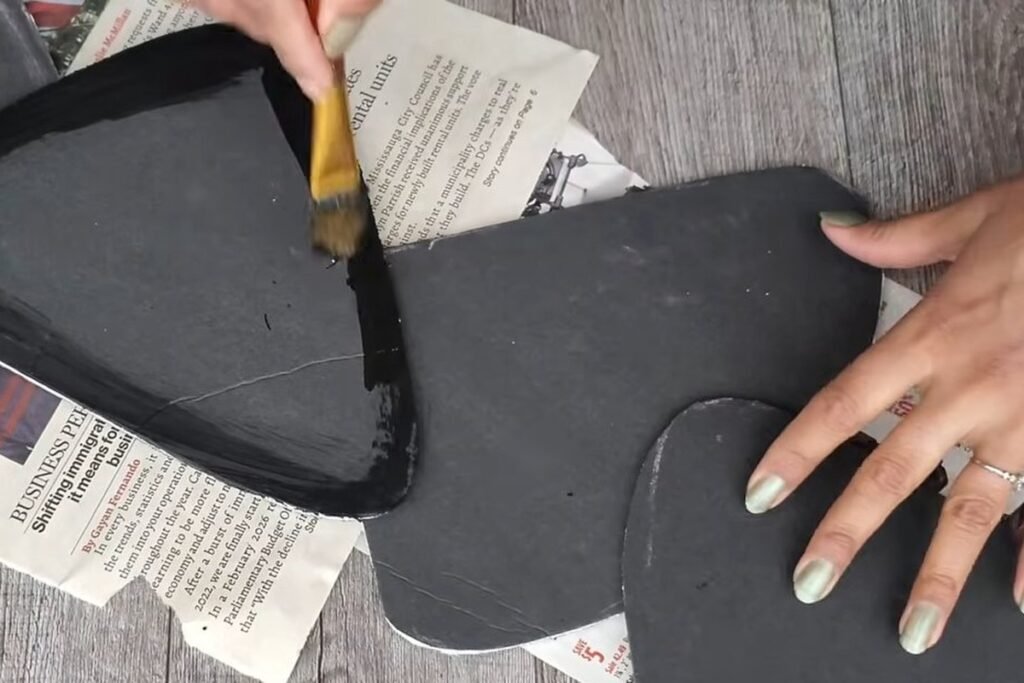
Brush black paint along the rims and cut edges of the foam shapes. This hides the cut edge and gives the frames a smooth, glossy border. Let the paint dry before you glue the mirrors in place.
Step 9: Glue the mirror pieces into the frames
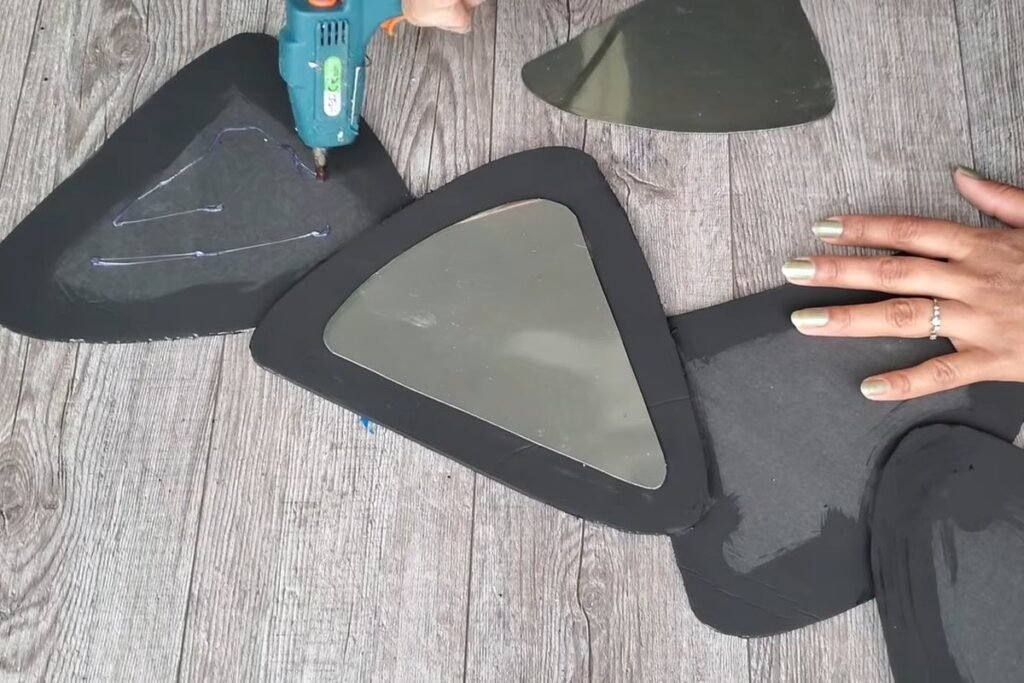
Run hot glue on the foam and press each mirror piece into its frame, one at a time. The cluster slowly turns from a black chain into a mirror piece. Press on the middle of each mirror so the metal does not buckle.
Step 10: Wipe the mirror surfaces clean
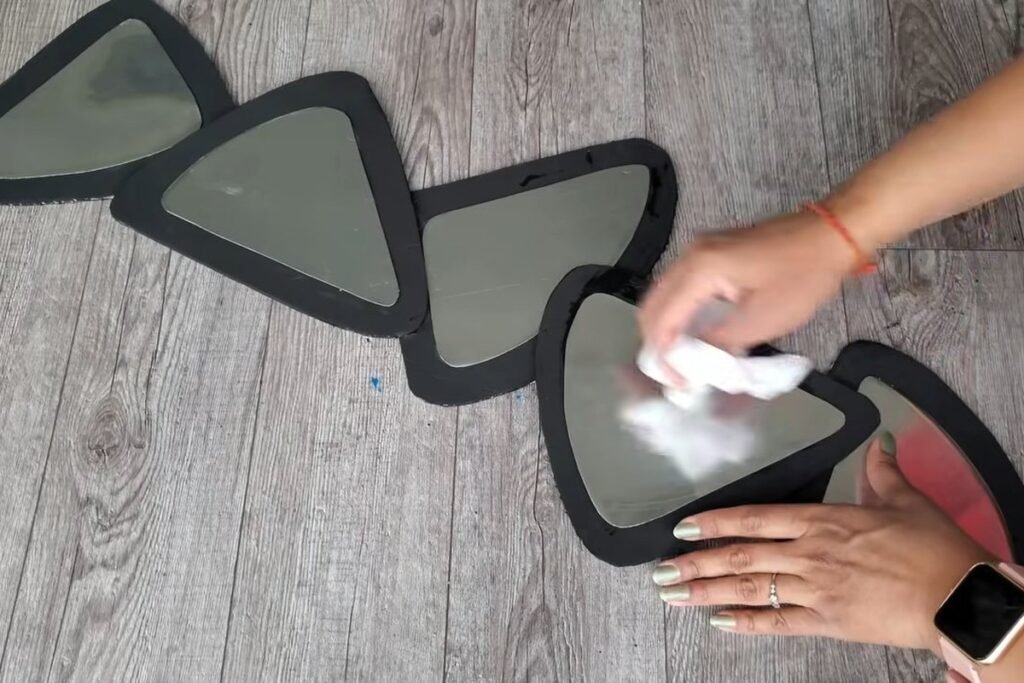
Wipe every mirror with a soft cloth to remove fingerprints and any glue threads. The metal scratches easily, so use a clean, soft cloth.
Step 11: Glue a hanger piece on the back
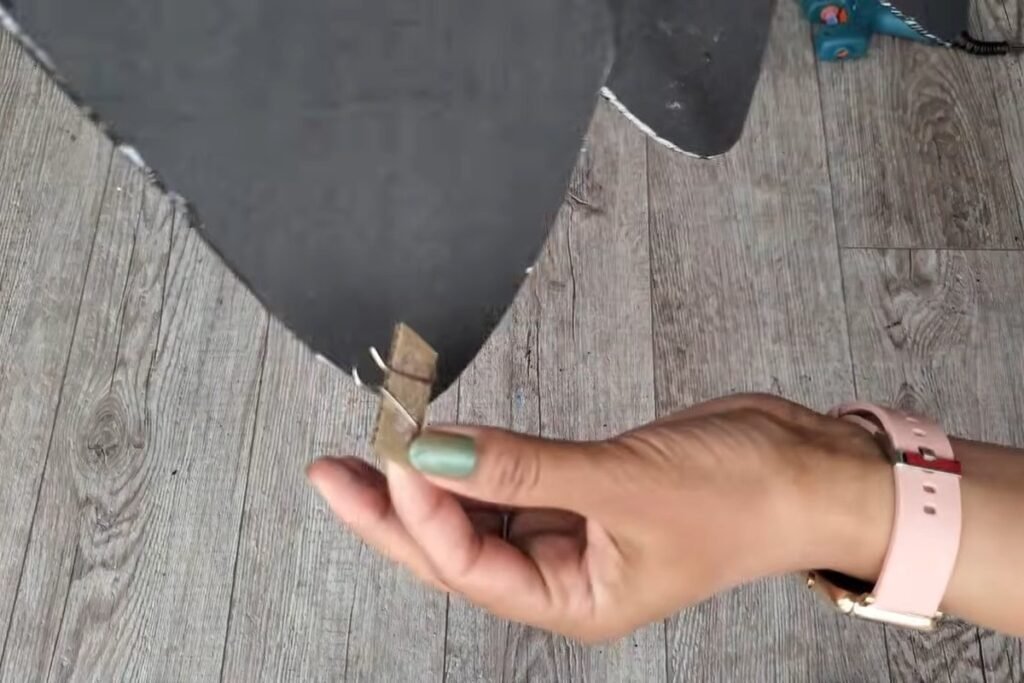
Turn the piece over and glue a small wooden hanger to the back with hot glue. The maker does not say what the hanger is; a sawtooth picture hanger or a small flat loop would do the same job. Because the whole chain is foam and thin metal, it is light, but for a long piece use two hangers.
Step 12: Hang the finished cluster
The finished cluster is a chain of five mirrors in black frames. Lay it on the floor to check the order, then hang it on the wall.
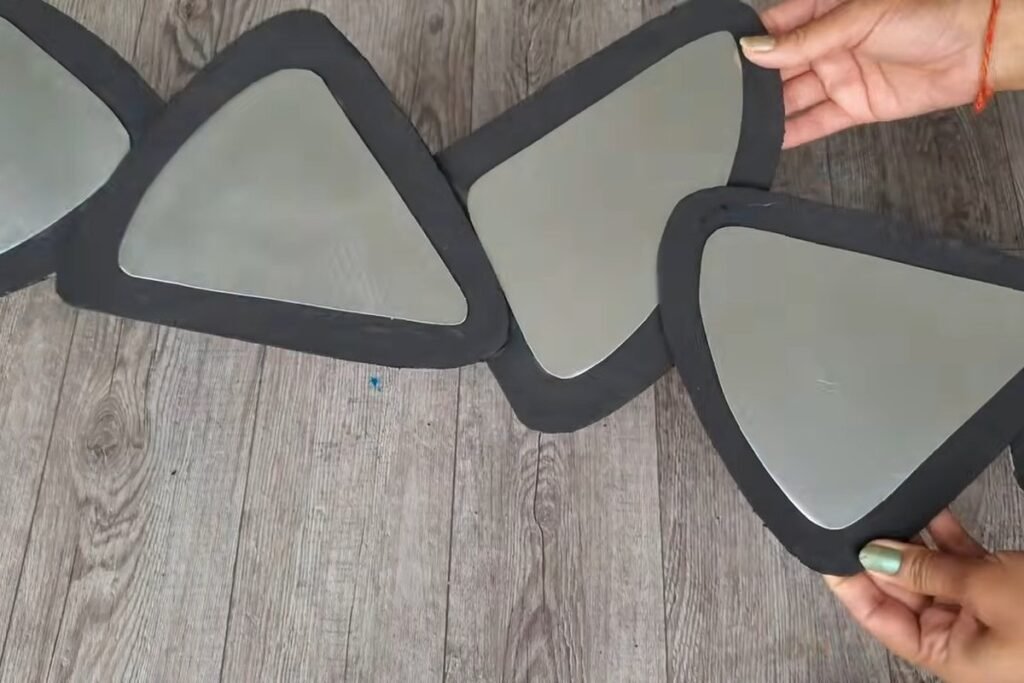
The mirror cluster asks the most of your cutting skills, but it is also the piece that looks least like Dollar Tree wall decor once it is hung, because the black frames and shiny mirrors read as designer work.
Project 4: Gold and Black Plate Art on Frames
The last Dollar Tree wall decor project has the simplest idea: paint two large plates with stripes of gold and black, then glue each plate to an empty picture frame. The original project stops while the plates are being matched to the frames, so the final hung piece is not shown, and the steps below stop where the maker’s work stops.
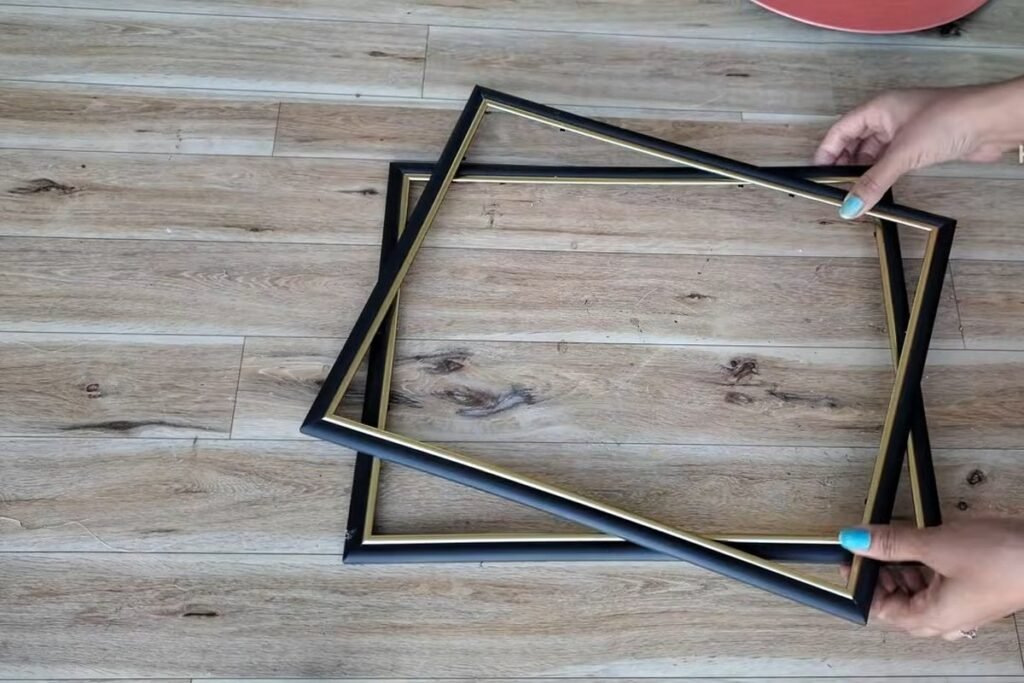
Step 1: Remove the glass and backing from two frames
The maker’s on-screen note says you only need the frame, so the glass and the backing board come out of two black frames with gold inner trim. Dispose of the glass safely, wearing gloves if it is loose.
Step 2: Choose two large plastic plates
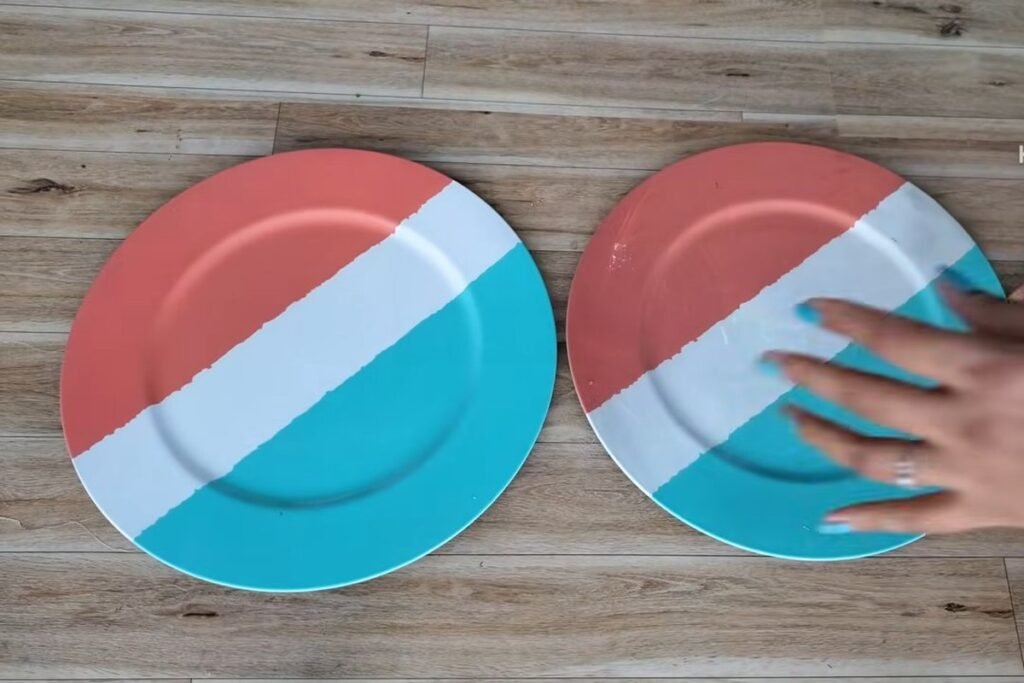
Two large hard plastic plates are the canvas. The maker’s plates already carry coral, white and teal bands, which get painted over. Any large plastic plate with a flat middle works.
Step 3: Spray the bare half of the plate gold
Cover one half of each plate with paper and tape, then spray the bare half with metallic gold. The paper hides the other half from the overspray; the gold shows up crisp along the tape line. Spray outdoors and let the paint dry before moving on.
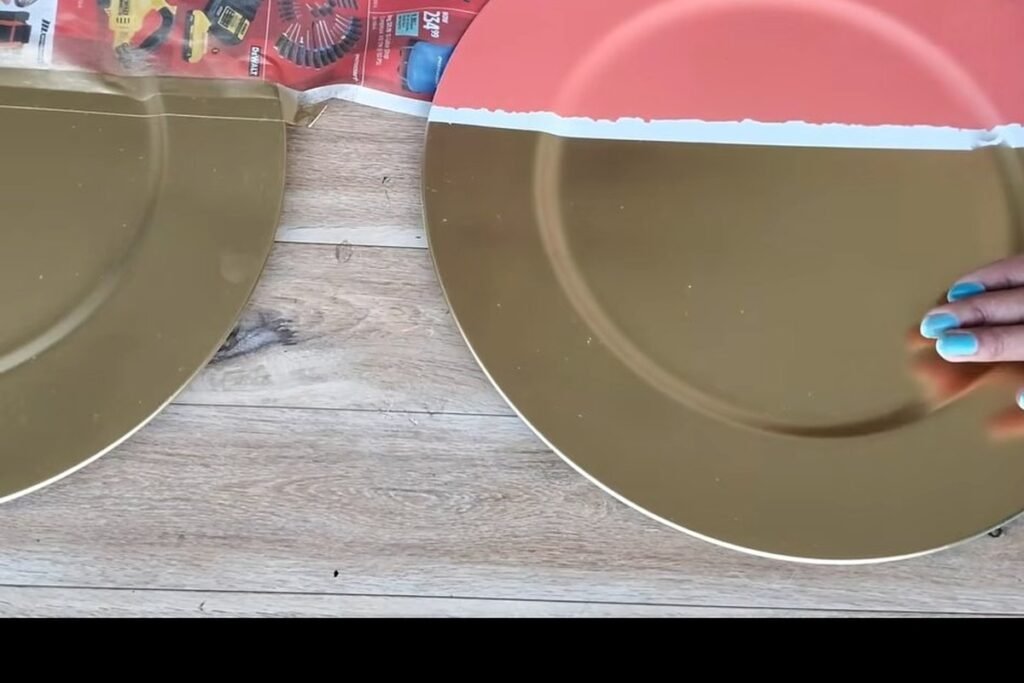
Step 4: Tape across the plate for a stripe
Press masking tape across the plate along the gold area to protect a stripe. The tape defines the gold band that will remain after the black coat.
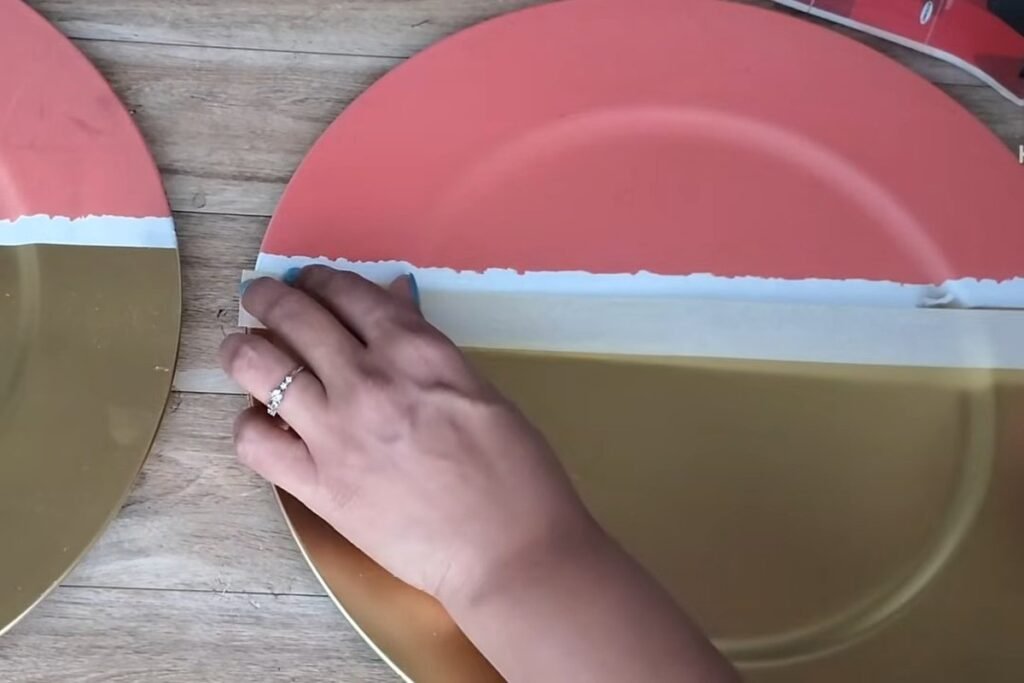
Step 5: Add a second tape strip and cover the rest
A second strip of tape and sheets of paper cover the parts that should stay gold. Then the maker sprays the whole plate black, which paints over the coral and leaves the taped parts untouched.
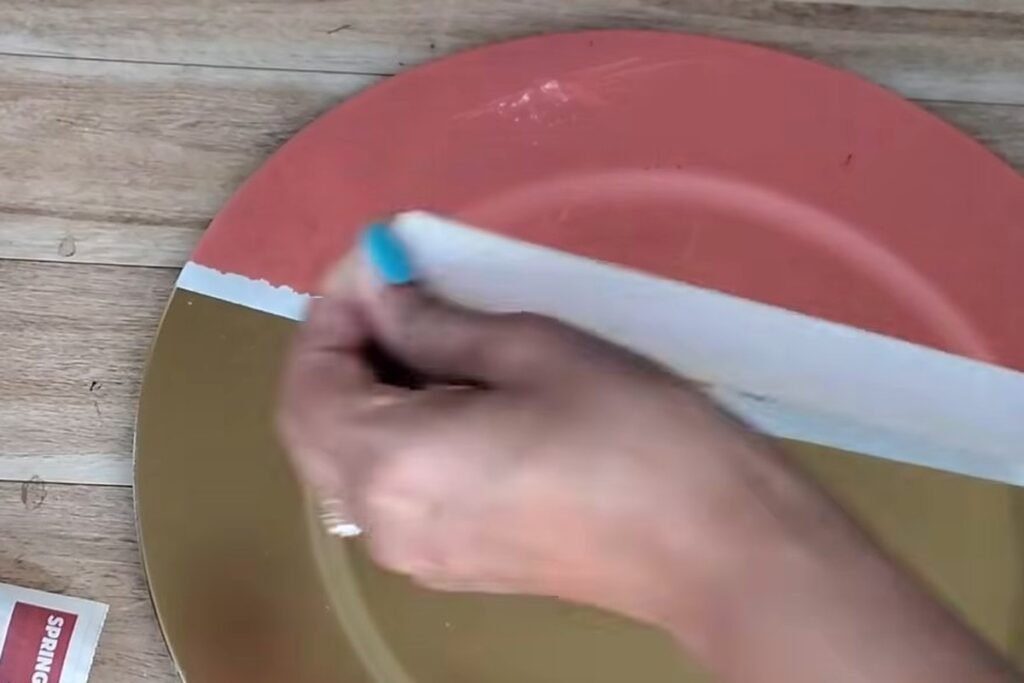
Step 6: Peel the tape to reveal the gold stripe
When the black paint is dry to the touch, peel the tape away. A crisp gold stripe sits between a gold half and a black half. Peeling the tape before the paint is fully cured gives sharper lines.
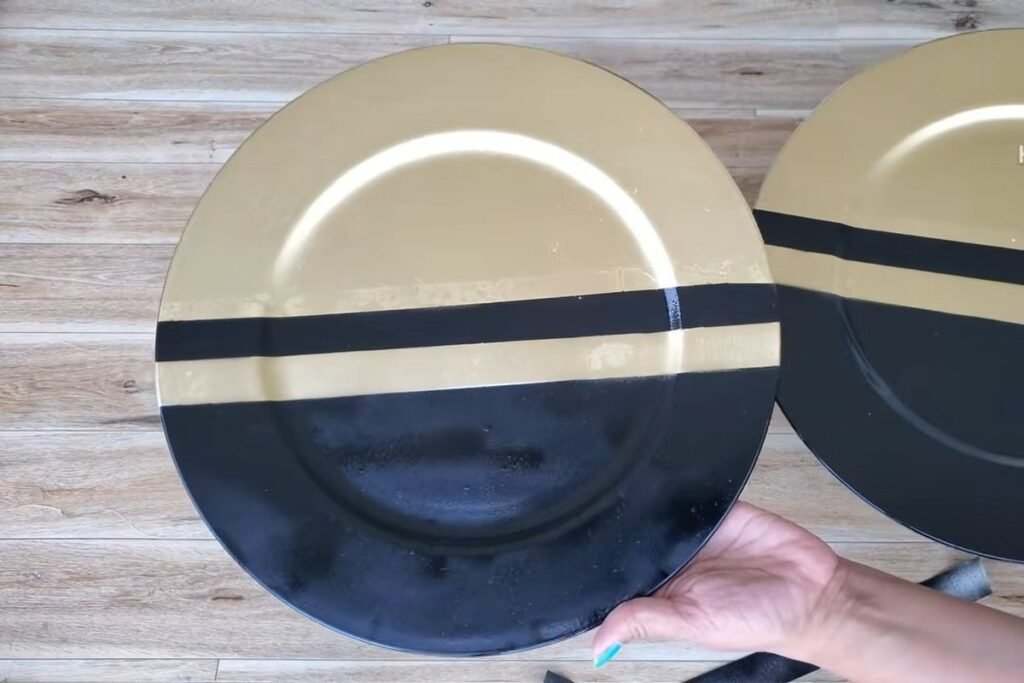
Step 7: Test each plate against a frame
Lay each plate over a frame to see how it sits. In the photos the plates are larger than the openings, so they rest on the frame and hide the opening. Decide the stripe direction now, because the glue is quick to set.
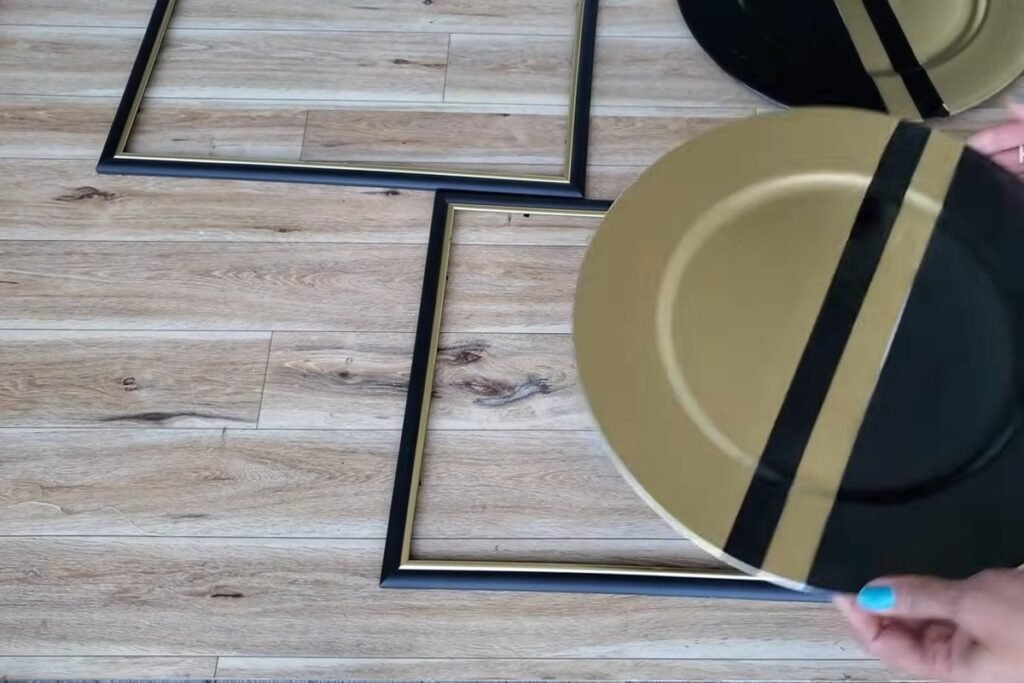
Step 8: Glue the plate onto the frame
The on-screen labels name a strong white craft glue and a hot glue gun. The glue goes on the back rim of the plate or on the frame, and the plate is pressed down. Check that the plate is level before the glue sets.
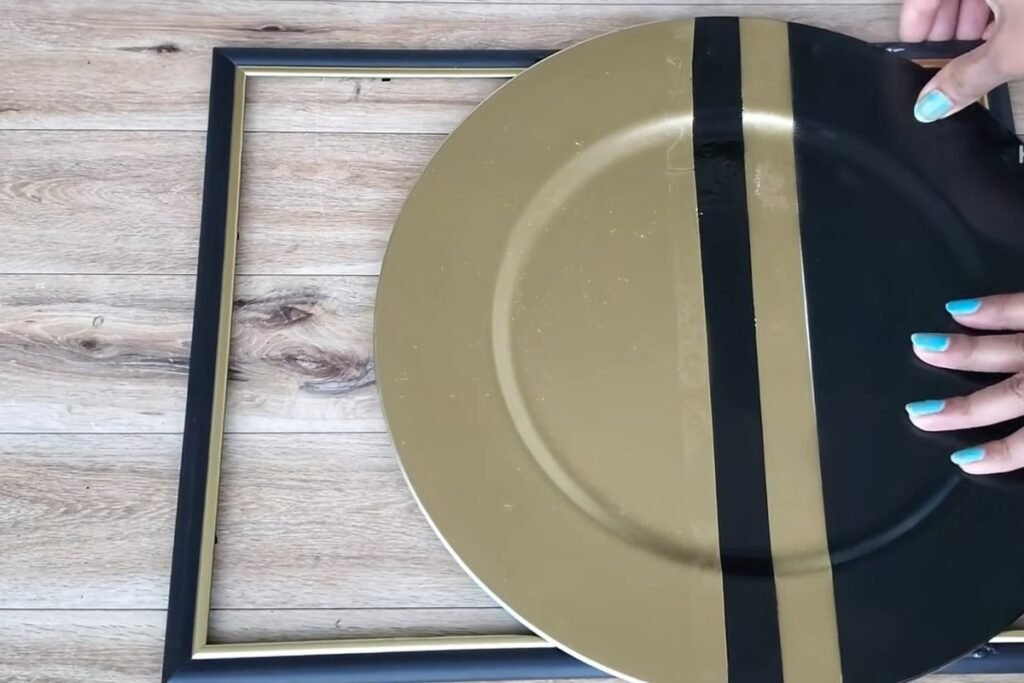
Step 9: Set the second plate beside the first
Repeat for the second plate. The project stops here, with the two plates beside the frames, so the finished wall pair and the hanging method are not shown. The plates and frames are light, but check the weight on your own pieces before choosing a hook.
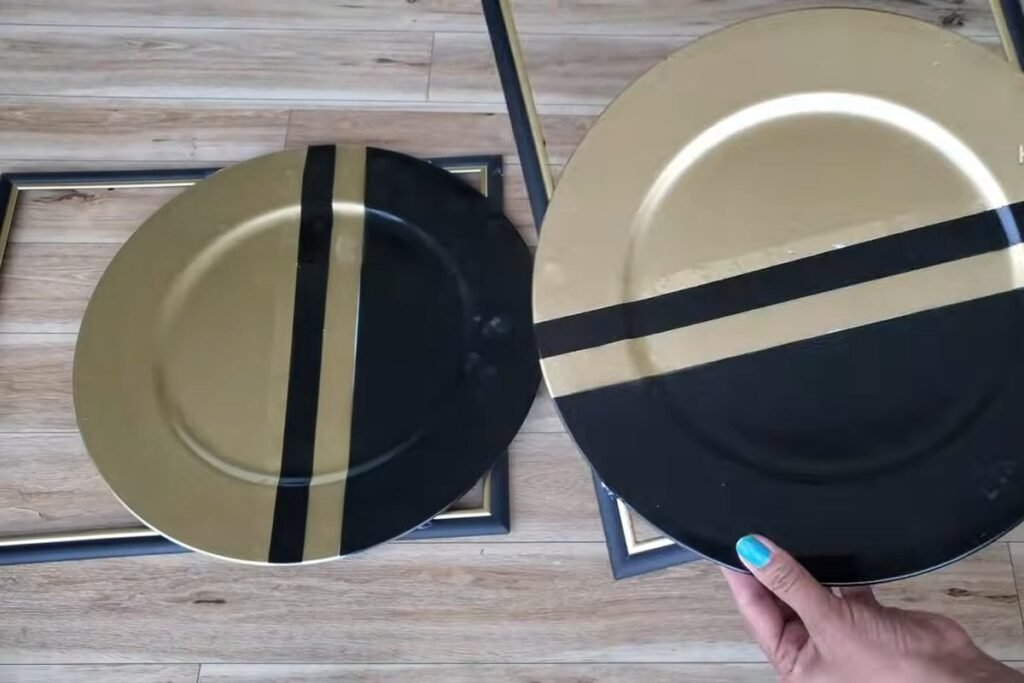
The plate pair finishes the set. All four Dollar Tree wall decor pieces use gold as the thread that ties them together, so the sunburst, the mirror, the cluster and the plates can hang as one Dollar Tree wall decor collection.
Where Dollar Tree Wall Decor Usually Goes Wrong
Most trouble with budget Dollar Tree wall decor like this comes from paint, glue and cutting, not from the ideas themselves.
- Sticky, uneven spray paint. Spraying too close in one thick coat causes drips; use light passes and let each one dry as the can instructs.
- Straws that slide on the board. Hot glue sets fast, so mark the position first and press each straw for a few seconds.
- A crinkle frame that peels. If the plastic wrap lifts, there was too little glue under it or the edges were not folded to the back and glued.
- Sharp tray edges. Cut metal can slice a finger; round the corners, wear gloves and tape any raw edge.
- Plates that crack or flake. Paint on thin plastic scratches easily, so seal it with a clear spray if the plates will be handled.
Make Your Own Dollar Tree Wall Decor
These Dollar Tree wall decor variations are our suggestions, beyond what the original maker shows.
- Change the colors. Silver rays on navy, or copper on cream, make the same Dollar Tree wall decor feel new. For more ways to layer color on a wall, see boho wall decor.
- Scale it. A small circle makes a bedside piece, while a big one anchors a sofa wall.
- Mix the pieces. A sunburst, a mirror and a pair of plates make a Dollar Tree wall decor gallery that reads as a single look; for more wall projects, see DIY doily wall decor and bubble wrap home decor, and for cheaper swaps see economy home decor.
Safety and Dollar Tree Wall Decor FAQ
Dollar Tree wall decor projects like these combine spray paint, hot glue, cut metal and blades, so a few safety points matter more than usual.
- Spray paint needs air. Krylon says to spray outdoors whenever possible; if you must spray indoors, open all windows and doors, use a fan to push fumes toward them and wear a painting mask. Krylon also advises spraying between 55 and 75 degrees F with humidity under 60 percent, and says most of its paints are dry to the touch in 20 to 25 minutes and ready to handle in about an hour. Other brands differ, so follow your can.
- Hot glue burns. Texas A&M AgriLife Extension says not to touch the heated nozzle, never to leave a gun unattended, and to put paper or cardboard under the stand to catch drips. Manufacturer manuals list roughly 160 to 290 degrees F on low and 350 to 380 degrees F on high, depending on the gun, and melted glue sticks to skin. For a burn, cool it under running water and get medical help if it is serious.
- Cut metal is sharp. CSU Chico Environmental Health and Safety advises cut-resistant gloves whenever you handle sheet metal or other sharp-edged material, and safety glasses with hand tools; it adds that such gloves are cut resistant, not cut proof. Round the corners of the tray pieces and tape any raw edge.
- Box cutters. The same CSU Chico guide says a sharp knife is safer than a dull one, so change the blade when it tears or drags, keep your free hand and body out of the line of cut, extend the blade only as far as needed and retract it when you stop.
- Wall weight. 3M lists its Command small picture-hanging strips at 4 lb per pack of four pairs (frames up to 8 x 10 in) and its medium strips at 12 lb (frames up to 18 x 24 in), and retailer listings show large strips at 16 lb. Weigh each finished piece on a kitchen scale and stay well under the strip rating; for anything heavier, a screw or wall anchor is the safer choice (our advice, not a manufacturer figure).
- Glass and cans. Remove the glass from the frames over a table, wear gloves if it is loose, and wrap it before it goes in the bin. Keep spray cans away from heat and flame and read the warnings on the label.
How much does Dollar Tree wall decor like this cost?
At big-retailer prices a single project runs about $22 to $62 new, and all four come to roughly $86 to $166. Dollar Tree’s standard price is typically $1.25 with some items higher, according to NBC News, so the supplies bought there can cost less, but we could not confirm the shelf price of the exact tray, plates or mirror sheet. Items you already own, such as a glue gun, take the total down.
Can you make Dollar Tree wall decor in one weekend?
The original project gives no clock times for any of the four Dollar Tree wall decor pieces. Most of the work is cutting, gluing and waiting for paint, so plan on a weekend for all four and expect the spray paint to need extra drying time (our estimate).
How do you hang Dollar Tree wall decor made from straws, foam and plates?
The original project shows a twine loop on the wooden circle for the sunburst, a binder clip for the oval mirror, and a small hanger glued behind the mirror cluster; it does not show the plate frames being hung. Weigh each piece and match it to the hook: 3M lists its small Command strips at 4 lb and medium strips at 12 lb, and anything heavier is safer on a screw or wall anchor.
Is it safe to cut a metal tray with scissors?
The maker cuts the thin metal tray with scissors. Metal edges are sharp: CSU Chico Environmental Health and Safety advises cut-resistant gloves and safety glasses when cutting sheet metal, and notes that cut-resistant gloves are not cut proof. Round every corner after cutting, tape the raw edges, and use tin snips if your scissors struggle (our suggestion).
What if your Dollar Tree does not carry these items?
Store stock varies. Any craft or discount store sells the supplies for this Dollar Tree wall decor, such as straws, foam board, plates and frames; the tray and mirror sheet are the pieces most likely to differ, and thrift stores are a good source of frames and trays.
Sources
- Krylon spray paint FAQ (ventilation, temperature, drying times): krylon.com
- Texas A&M AgriLife Extension, Duds to Dazzle Safety Guide (hot glue guns, cutting tools): d34-h.tamu.edu
- CSU Chico Environmental Health and Safety, Safe Use of Knives and Other Sharps (sheet metal gloves, utility knives): csuchico.edu
- 3M Command picture-hanging strips, product page (weight ratings): 3m.com
- NBC News, March 2025, on Dollar Tree standard and multi-price points: nbcnews.com
- Retail price ranges: snapshots from large US retailers (mostly Walmart, with some Staples, Target and Ace Hardware listings) checked in October 2026; they vary by store and week.
Project credit: this project idea comes from the DIY channel Craft Angel.