
1 / 6
DIY Pom Pom Garland Winter Decor Guide
$6.99
Make a soft, cozy yarn pom pom garland for winter with a 24-step photo guide, from wrapping and tying each pom pom to stringing and hanging.
Secure checkout on Whop. Your receipt and access to the PDF arrive by email.
- 28 printable pages with 24 numbered steps
- A clear photo for every step
- Materials list with amounts and easy swaps
- Format
- PDF guide, 28 pages
- Level
- Beginner
- Making time
- About 20 to 30 minutes per pom pom
- Finished size
- Any length you like
What is inside the guide
- 28 printable pages with 24 numbered steps
- A clear photo for every step
- Materials list with amounts and easy swaps
- Tips and ready-for-next-step checks
- Troubleshooting table for common pom pom problems
- Winter color ideas, care notes and a shopping checklist
Materials and tools
- Worsted weight wool yarn in 2 to 4 colors (leftovers work)
- Baker's twine or thin butcher's twine
- Dental floss or strong button thread
- Clip-style pom pom tool, large size
- Large-eye darning needle and sharp scissors
About this project
This DIY pom pom garland guide shows you how to turn soft wool yarn into a string of round, fluffy pom poms that brings warm texture to your winter decor. It is written for a calm evening at the table, with a clear photo for every one of its 24 steps. You need no knitting or crochet skills, only yarn, twine and a simple clip-style tool.
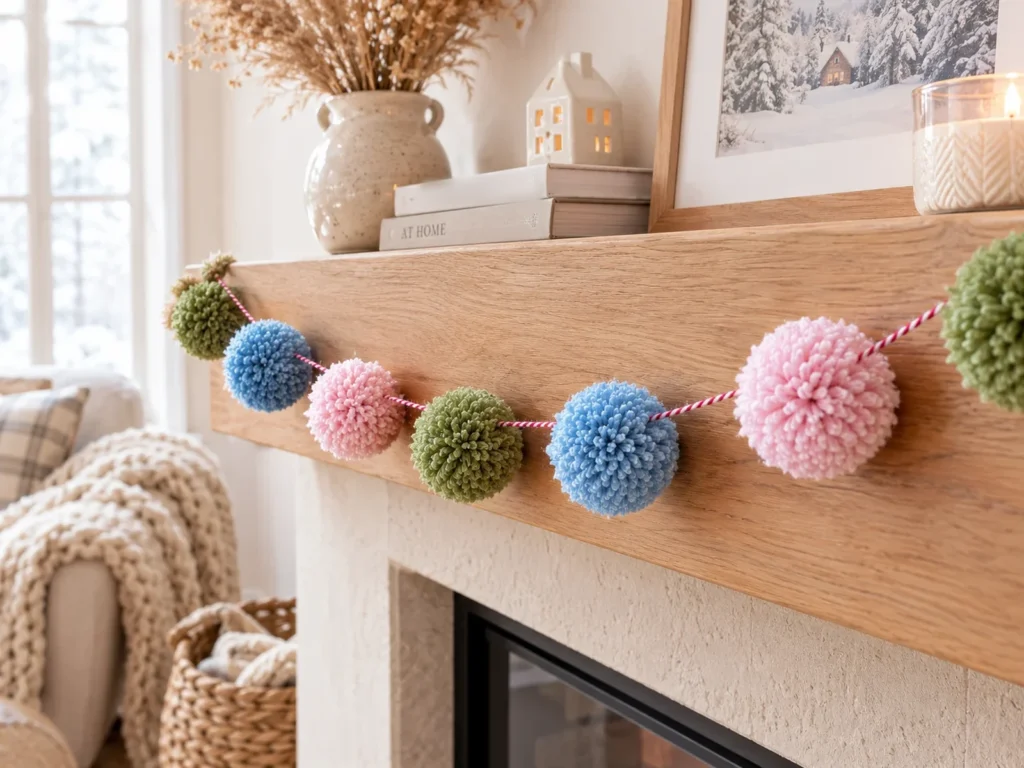
What you will make with this DIY pom pom garland guide
You will make thick yarn pom poms on a clip-style pom pom tool, tie each one firmly at the center and trim it into a neat ball. Then you thread the pom poms onto baker’s twine and set the spacing by eye. The finished DIY pom pom garland is light, soft and textured, and it drapes nicely along a mantel or a shelf.
Because you decide the colors, the size and the length at the end, no two garlands look the same. A short one for a single shelf can be done in an evening. A long one that runs across a window or a whole wall simply takes more pom poms, made one at a time whenever you have a spare half hour.
How the DIY pom pom garland comes together
The guide breaks the project into five short stages, so you always know where you are and what comes next.
- Prepare. Set out your supplies, learn how the arches of the tool open and close, and choose a solid, striped or two-tone color effect.
- Wrap the first side. Wrap yarn back and forth over two open arches until the curved shape disappears under a full, even layer.
- Wrap the second side. Close the full side, open the other pair of arches and wrap until both sides match.
- Cut and tie. Hold the tool closed, cut along the center groove, then tie doubled dental floss around the middle with tight half knots.
- Shape and string. Fluff and trim each pom pom, thread a large-eye needle with twine, push it through the firm center and space the pom poms along the line.
Each stage ends with a quick check, so you can see that a pom pom is ready before you move on. That small habit helps every pom pom stay together once your DIY pom pom garland is up on the wall.
Choosing yarn and colors for a cozy winter look
Worsted weight wool is the friendly choice for this project. It fluffs up after trimming and gives a full, round shape, while acrylic works too but stays a little flatter. If you are unsure what “worsted” means on a label, the Craft Yarn Council yarn weight system chart explains the standard weight categories and the symbols printed on yarn bands.
For color, think about the room first. Soft winter neutrals such as cream, oatmeal, gray and white feel calm and work almost anywhere. Icy blue, silver gray and white with natural jute twine feel fresh and frosty, and a few blush or berry pom poms add a gentle pop of warmth.
- Solid pom poms: one color per pom pom, arranged in a repeating order.
- Two-tone pom poms: a different color on each side of the tool.
- Confetti pom poms: two strands held together while you wrap.
- Mini garland: a smaller tool and closer spacing for a short shelf or mirror.
Leftover yarn from other projects is perfect for a DIY pom pom garland. Even a small amount is enough for a pom pom or two, so this is a lovely way to use up partial skeins.
Where to hang your DIY pom pom garland
A DIY pom pom garland is light enough to hang almost anywhere with small hooks or removable adhesive hooks. Try it across a mantel, along the top of a bookshelf, over a window frame or above a headboard for a soft, cozy feel in the bedroom.
It also suits shared spaces. Teachers and parents can drape one along a bulletin board or a reading corner, and if you are planning a whole room, our guide to winter decoration ideas for the classroom shows more ways to bring the season indoors. Wherever it goes, keep the garland away from candles, heaters and other heat sources.
When the cold months are over, coil it loosely in a box rather than squashing it. A quick roll between your palms and a light trim will refresh any pom poms that flattened in storage.
Who this DIY pom pom garland guide is for
This guide is made for beginners, busy parents, teachers and anyone who wants a simple, relaxing make. The only skills involved are wrapping yarn, cutting and tying a knot, and each one is shown in a photo.
It also helps if you have tried pom poms before and ended up with thin, patchy or loose ones. The steps explain how much to wrap, how to hold the tabs while you cut, and how to tie a center knot that stays put. A troubleshooting table covers common problems such as a flat side, long stray strands or a needle that will not go through.
Families can make a DIY pom pom garland together, too. Older children can wrap and fluff while an adult handles the cutting and the sharp needle.
What you get in the PDF
The guide is a 28-page printable PDF that follows the project in order, from the first wrap to the last knot on the twine. Every one of the 24 numbered steps has its own photo and short, plain instructions, with tips where they help most.
You can read it on a tablet at the table or print only the pages you need. Keep it open beside you as you work, and turn the page only when the check at the end of each stage looks right.
Making a DIY pom pom garland is a slow, satisfying project that rewards a little patience with soft, handmade texture. Once your first pom pom is done, the rest go faster, and you can keep adding to the line all winter long.
You may also like
All budget makes guides

Questions
Do I need any knitting or crochet skills?
No. The only skills used are wrapping yarn, cutting and tying a knot, and each one is shown step by step.
What kind of yarn works best?
Worsted weight wool fluffs up well and gives a full, round pom pom. Acrylic works too, but it is a little less fluffy.
Can I make it without a pom pom tool?
The guide is written for a clip-style pom pom tool, which gives the roundest results. Cardboard rings can work, but the steps and photos follow the tool.
How many pom poms do I need?
Plan on about one pom pom for every 5 to 7 inches of twine if you like a little space between them, or more if you want them packed together.
Is this a physical product?
No. It is a digital PDF guide that you can read on screen or print at home.
How do I get my guide?
Checkout opens on Whop. After payment, Whop emails your receipt with access to the PDF.
Can I print the guides?
Yes. Print them at home or at a print shop, or follow along on your phone or tablet.
Is this a physical product?
No. You buy a digital PDF guide. Nothing is shipped.
What if my file does not open?
Write to us through the Contact page and we will sort it out.